LabLynx KB:ELab 7 user manual - sample groups
Sample Group Overview
A Sample Group is a group of samples that are related in some way. They could be related by the type of analysis that needs to be run, the submitter, the project, etc. In ELab, the terms Project, Order and Sample Group are synonymous.
A Sample Group can be made up of any number of samples. The purpose of having a Sample Group is to give the laboratory a quick method for receiving samples, and also for grouping samples together to create a report for all of the samples and analyses in a Project or Order, assign tests/paths, analysts and the like.
Additionally, the Sample Group list page can serve as a quick and easy way to see a list of orders or projects, whether or not they have arrived in the lab, filtered by any criteria you like, e.g. "Received = yes, Submitter = XYZ, Received Date range = 1/20/15-2/30/15, sort by Analyst..." or by Status, Lab Due Date, Priority, etc.
For demonstration of Sample Group (Project/Order) Receiving in ELab, see:
![]() Project Receiving (http://files.mylablynx.com/share/eBooks/Movies/d139/d139.html)
Project Receiving (http://files.mylablynx.com/share/eBooks/Movies/d139/d139.html)
To Add or Edit Sample Groups
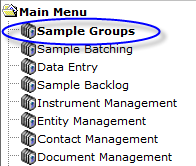
Navigate to the Sample Groups menu item (this may have been renamed to your preferences, e.g. Order Receiving, etc.).
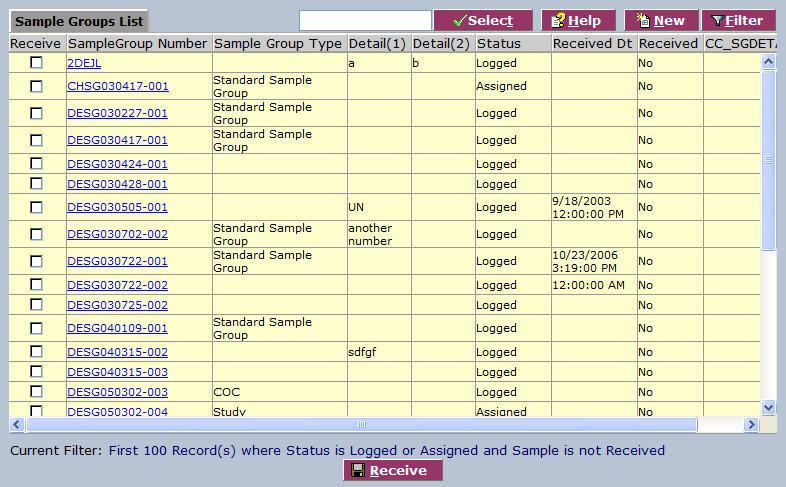
ELab displays the Sample Groups List, which is a list of all sample groups, or Projects/Orders, in the system for receipt.
To edit, click on a link in the list, or use the filter to find the project or projects you wish to edit. To define a new project, click New ![]() .
.
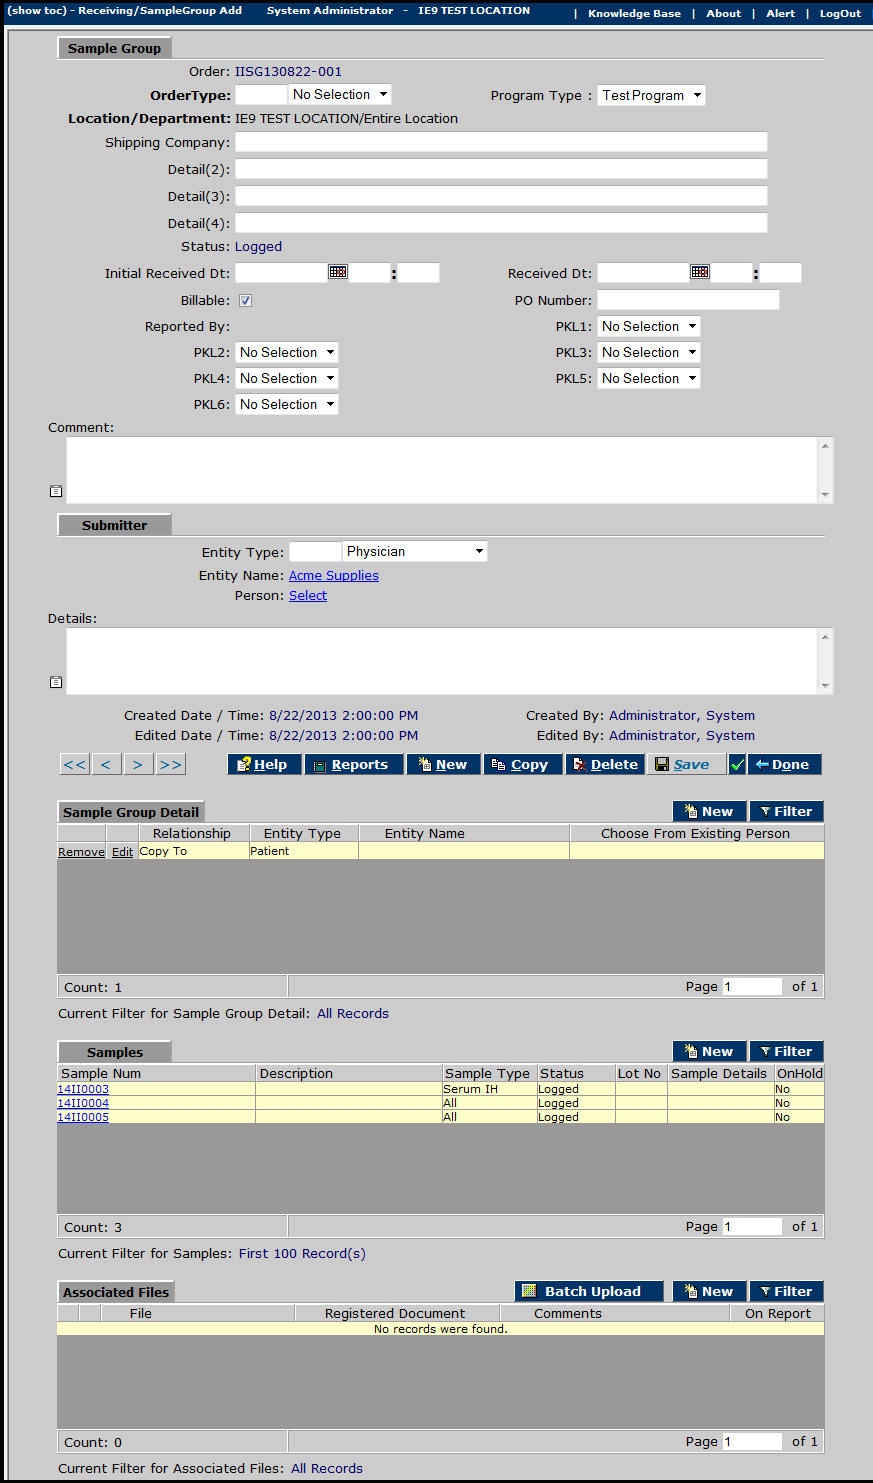
ELab displays the Project Detail edit screen.
This screen contains a number of component sections and fields to help you comprehensively define a project. These are configured to suit your specific preferences during initial implementation as part of standard setup. Component sections as delivered include:
- Sample Group - Basic project details
- Submitter - Project sample source details
- Sample Group Detail - Area where project entities and their relationships may be defined, including the projects own attributes
- Samples - Samples contained in the project
- Associated files - Any related files - photos, spreadsheets, graphics, documents, etc. are uploaded and linked here
Complete the fields of the Sample Group (Project) detail screen. Bold fields are required. These may comprise any of the following. Some of these may have been renamed or hidden during setup to suit your specific preferences. Complete the ones that apply to your procedures:
- Order - This field is automatically populated with the unique sample group/order number generated by the system according to a format specified by the laboratory.
- Order Type - These choices are predefined based on the laboratory's preferences, and are managed in the GEN/Receiving Picklist Management section under Sample Group Type.
- Program Type - Select from the predefined programs in the drop-down picklist. These choices are maintained in the managed in the GEN/Receiving Picklist Management section under Program Type.
- Location/Department - Enter the location or department associated with this project (may be automatically selected by system based on login, but initially remains editable).
- Detail Fields - Miscellaneous text fields for further defining the project. See LabLynx KB:ELab 7 user manual - Label Definitions to specify labels.
- Status - System-generated current status (initially "Logged")
- Initial Received Dt - Date the project samples were first received.
- Received Dt - Date all project samples received.
- Billable - Check this box if project is billable.
- PO Number - Project's associated Purchase Order Number
- Comments - Open text field for adding further project notes. This field is additive and will contain all notes entered over the course of the project.
When required information is entered, click Save ![]() . A unique Sample Group Number (Order/Project Number) is generated and displayed. When you click Done
. A unique Sample Group Number (Order/Project Number) is generated and displayed. When you click Done ![]() the new project or order displays in the Sample Groups List screen.
the new project or order displays in the Sample Groups List screen.
To Receive Sample Groups
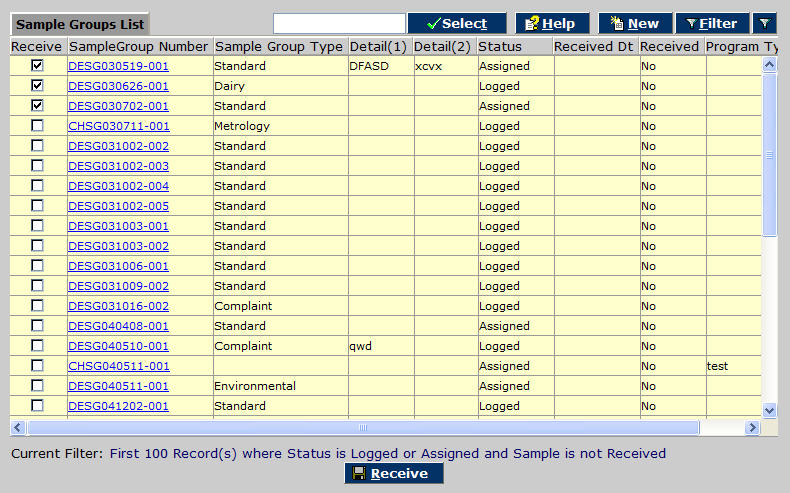
In the Sample Groups menu item screen, check the checkboxes of any sample groups/orders/projects you wish to receive.
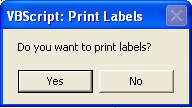
Click Receive ![]() . The system popup asks if you would like to print labels for the selected project(s).
. The system popup asks if you would like to print labels for the selected project(s).
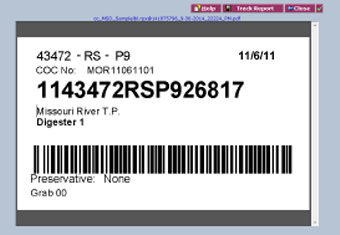
Select "Yes" to print. The labels are displayed in order as .pdf files. You may print as many labels as needed.
Whether you print labels or not, once Sample Groups have been received they are removed from the Sample Group receiving list screen.
Samples and Associated Files
The Samples area displays the samples that are associated with the sample group. The user may edit an existing record simply by clicking the selected record to display the Sample Details Add/Edit screen. You may also create a new record in this list by selecting the New ![]() button, which will also display a (new) Sample Details Add/Edit screen. (See the Samples section below for more on this.)
button, which will also display a (new) Sample Details Add/Edit screen. (See the Samples section below for more on this.)
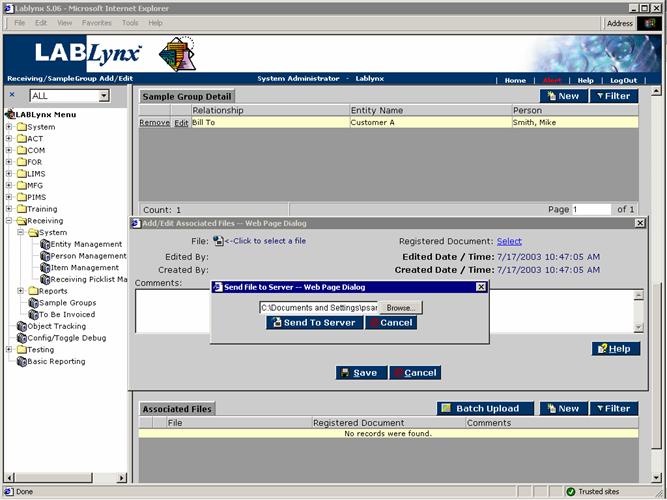
The Associated Files area lists the files that are related to the sample group. Edit an existing record simply by clicking the selected record to display the Add/Edit Associated Files screen. Create a new record in this list by selecting the New ![]() button or the Batch Upload
button or the Batch Upload ![]() button, which will also display the Add/Edit Associated Files screen:
button, which will also display the Add/Edit Associated Files screen:
Samples
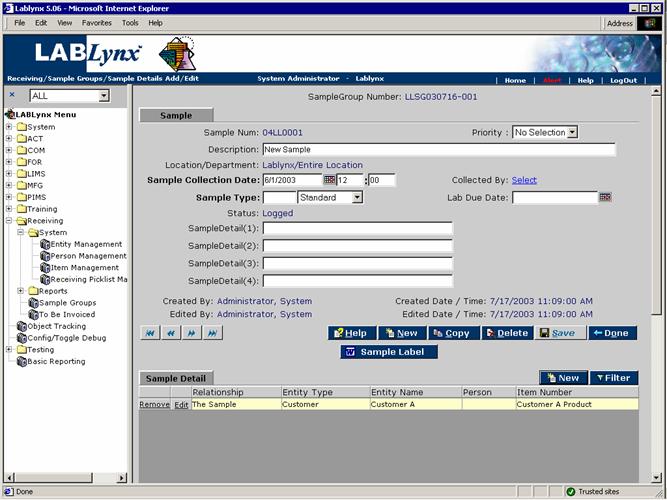
Clicking on a sample number or clicking the New button from the Add/Edit Sample Group Detail screen displays the specific details associated with a selected sample in the system or a new sample record. This screen has three parts:
Sample Details
This area contains the general information about the sample that was set up previously in the system, or, for new samples, the fields where information is to be entered. The top shows general information about the sample. Sample Type and sample Collection Date are usually required fields, and others may be designated during implementation setup, according to your own lab's preferences. These may also be changed at any time by authorized administrators.
The user can also enter a sample description, priority, lab due date, and "collected by" information. As with the Add/Edit Sample Group Detail screen, the Sample area has four detail fields that can be filled in per the laboratory's requirements:
Sample Detail area
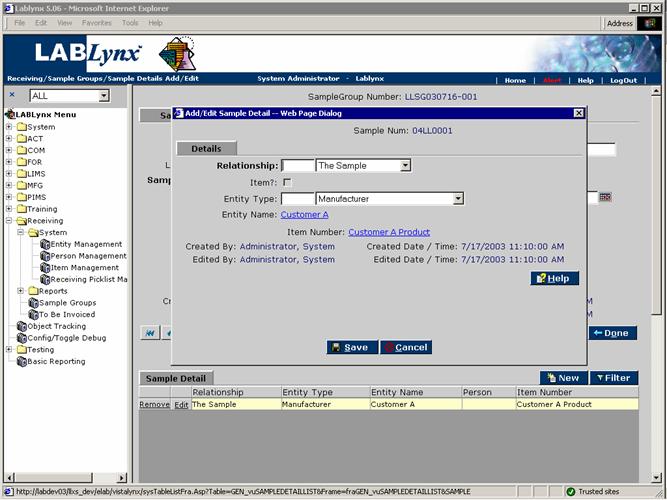
The next section of the screen is the Sample Detail area (see above image). As with sample groups, the user can enter additional details concerning the sample, including the defining of relationships between the sample and any other types of entities in the system. A sample can have one or more relationships associated with it.
For example, the user could choose the relationship type "The sample." This tells the system that the user is going to provide further information about the sample by choosing the Item or entity to associate with the sample. Items are particular sets of characteristics. They can include customer specs or limits, sets of tests, etc. When an Item is associated with a sample, its traits are automatically assigned to the sample.
Another example would be the user chooses a relationship type of "Manufacturer." This would tell the system that the user is going to define another entity to associate with the sample besides the Submitter that was defined earlier at the sample group level:
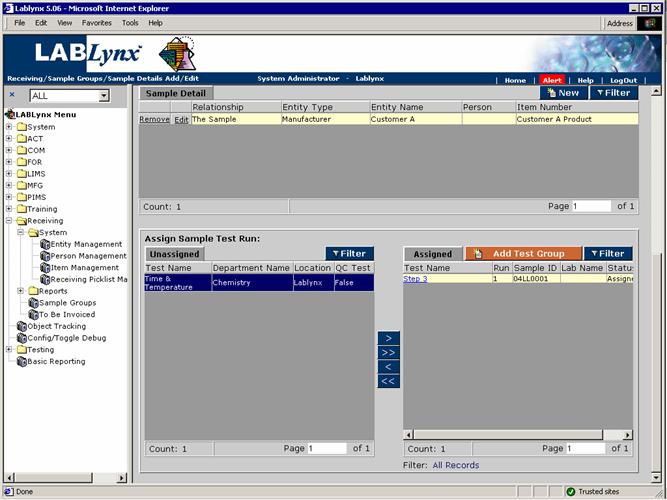
Assign Sample Test Run area
The last area of the screen is for test assignment, using the unassigned/assigned frame. Any tests that have been automatically assigned will show up in the Assigned frame. Should it be necessary to add or remove test(s), click on the appropriate test(s) and click on the Assign ![]() or Assign All
or Assign All ![]() button to add them or the Unassign
button to add them or the Unassign ![]() or Unassign All
or Unassign All ![]() button to remove them:
button to remove them:
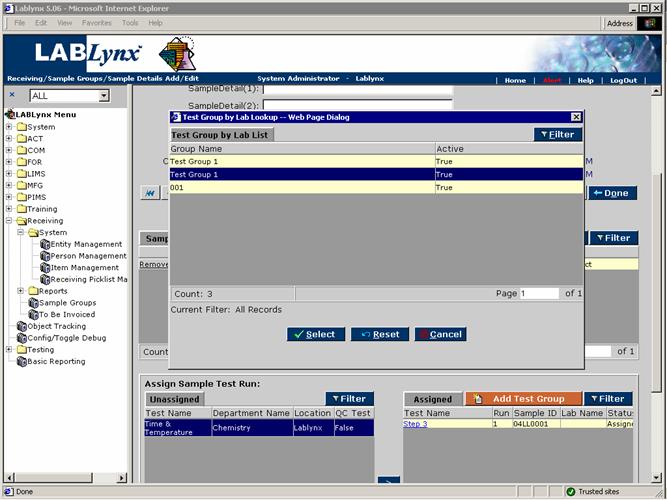
The user may also add a test group to the sample by clicking on the test group button and choosing the test group(s) to be added to the sample:
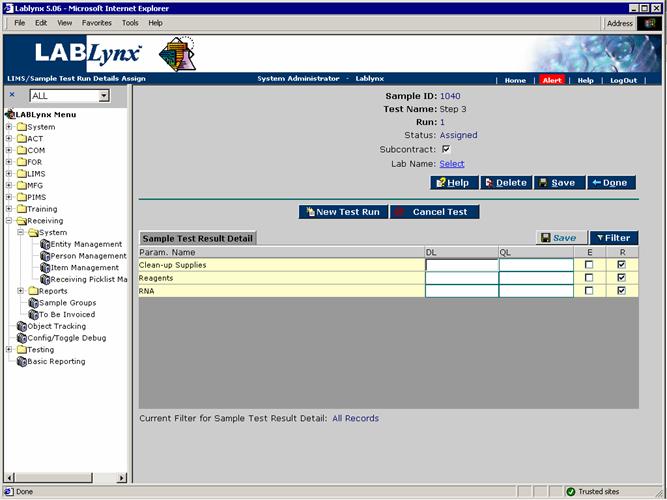
In the Assigned frame, the system will display the test name as a hyperlink. This link will take the user to an edit screen that allows the user to assign the sample/test to a subcontract laboratory, edit the detection limits for the test parameters for this sample, add a test run for this sample, or cancel the test run:
