LabLynx KB:Healthcloud POL user manual - order management
Overview
Orders can be created either before samples are taken or once they are in the lab to be tested. In either case, the final step to make them available in the system for analysis is to show them as Received. First, the order is created.
Order Management
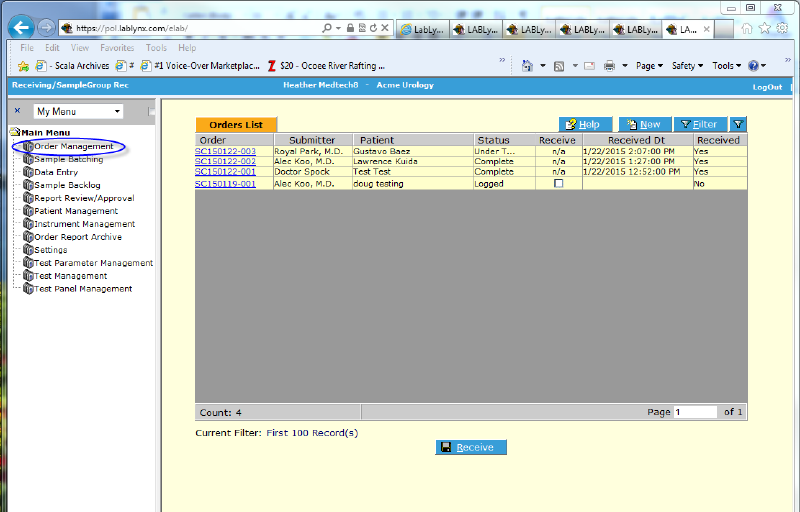
On login, HCPOL defaults to the first menu item, Order Management.
Order Management list screen
To add a new order, click New ![]() .
.
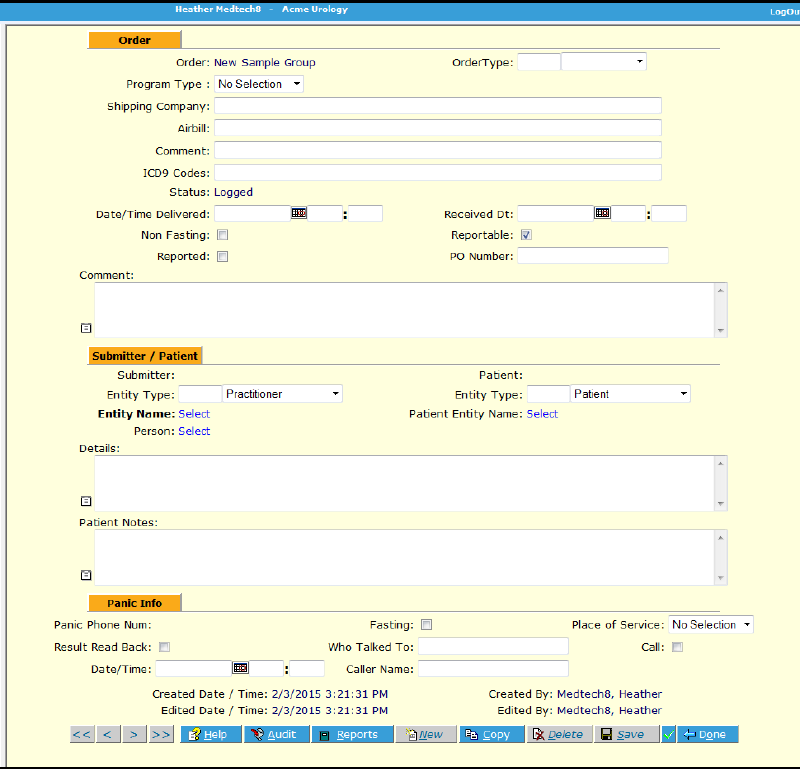
New Order screen displays
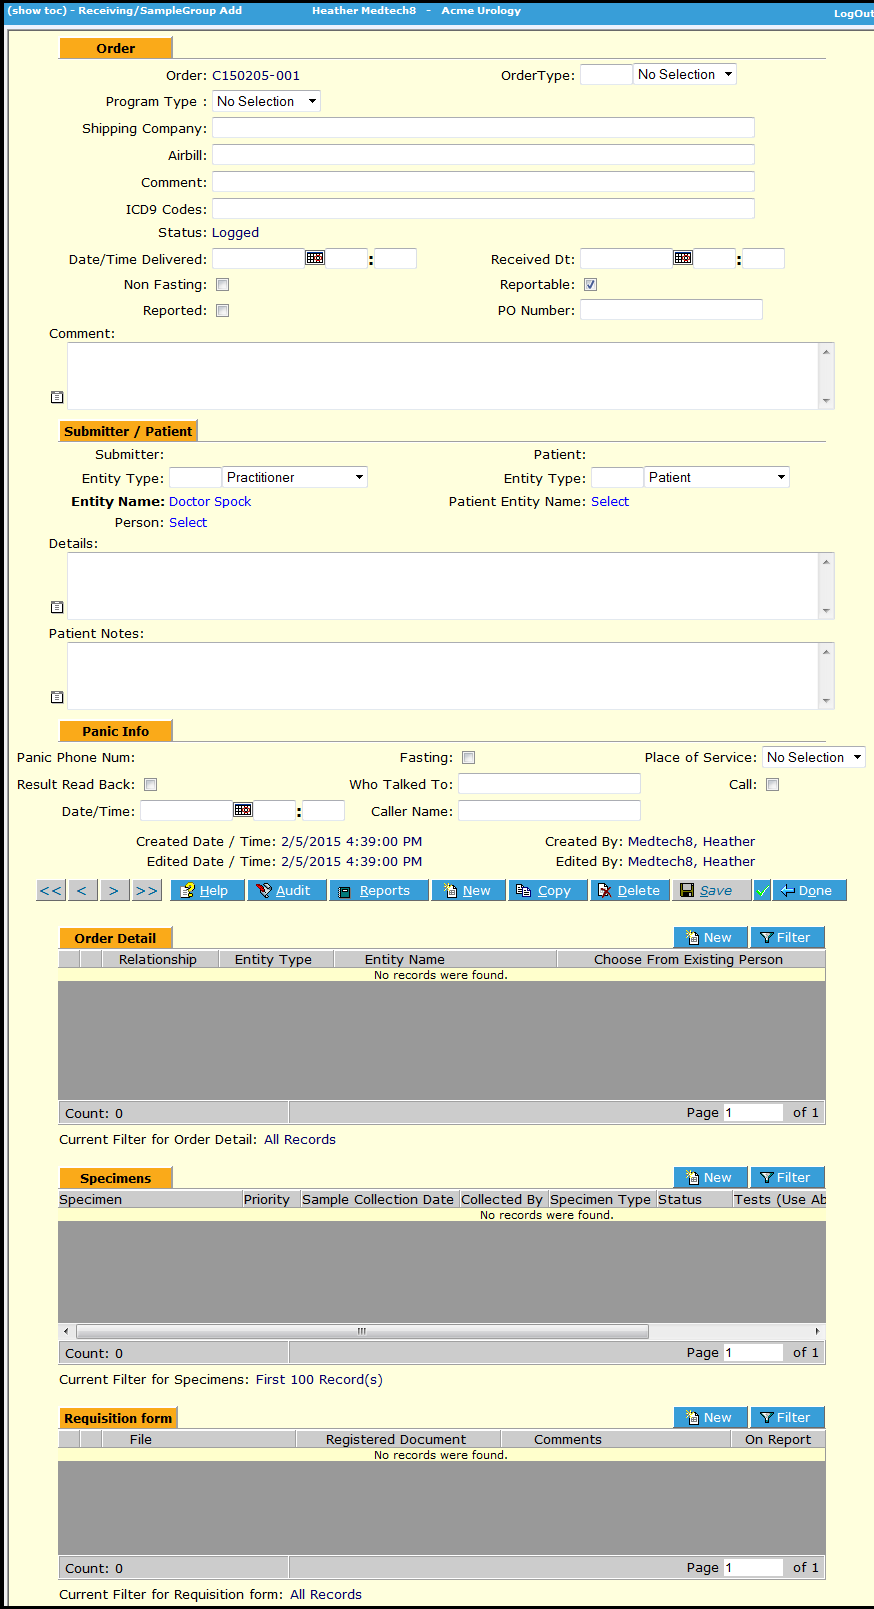
Fill in all details available. Mandatory fields are labeled in Bold. Once all necessary information is entered/selected, click Save ![]() . The new order is saved and will appear in the Orders List main Order Entry screen. It now also displays additional informational areas. These are discussed further down.
. The new order is saved and will appear in the Orders List main Order Entry screen. It now also displays additional informational areas. These are discussed further down.
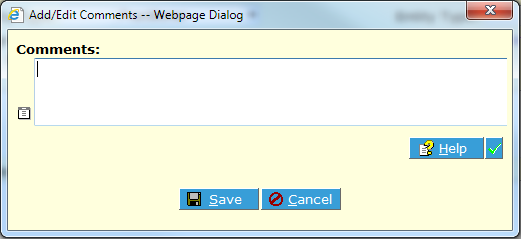
You can also add any comments in the Comments field. Once all necessary information is entered/selected, click Save ![]() . The new order is saved and will appear in the Orders List main Order Entry screen with the additional information.
. The new order is saved and will appear in the Orders List main Order Entry screen with the additional information.
The Order Detail screen refreshes with additional data areas
To Receive Orders
Log in, or navigate to the first menu item, Order Management by clicking on it.
Order Management list screen
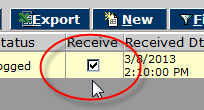
Simply click on the "Receive" checkbox of the order you wish to receive in the LIS.
…then click the Receive ![]() button.
button.
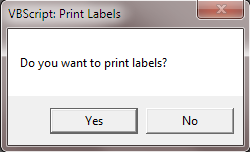
The LIS asks if you would like to print sample labels. Click Yes or No.
The Order is removed from the Order Management list screen and is ready to be processed.
- Note: If the order contains any samples that are On Hold, it will continue to be displayed on the Receiving screen and be unavailable for batching. Once the On Hold box is unchecked in the Order Detail screen, it will be moved from the Receiving list screen and its samples available for batching.
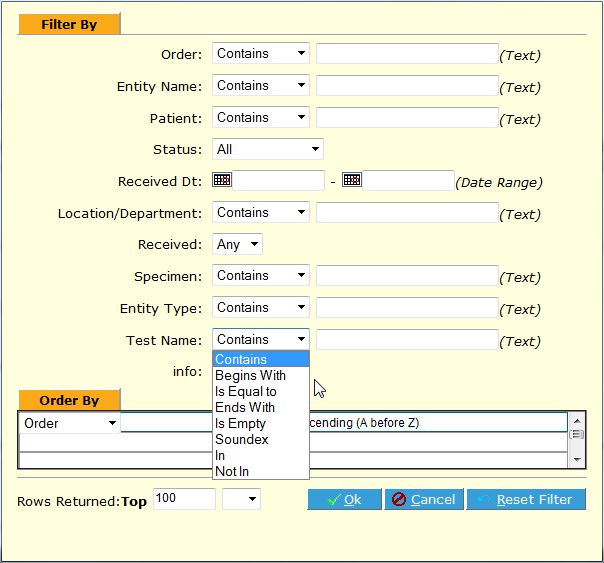
Filtering: If there are a lot of orders – in fact in any list screen where there are a lot of items – use the LIS Filter to quickly bring up the item (s) you need.
Simply enter the information that best narrows down your search:
- Note: The filter is “sticky”, that is, it remembers the last set of criteria you used to search. To remove the filter’s search criteria, click the Reset Filter
 button.
Additional Detail Areas
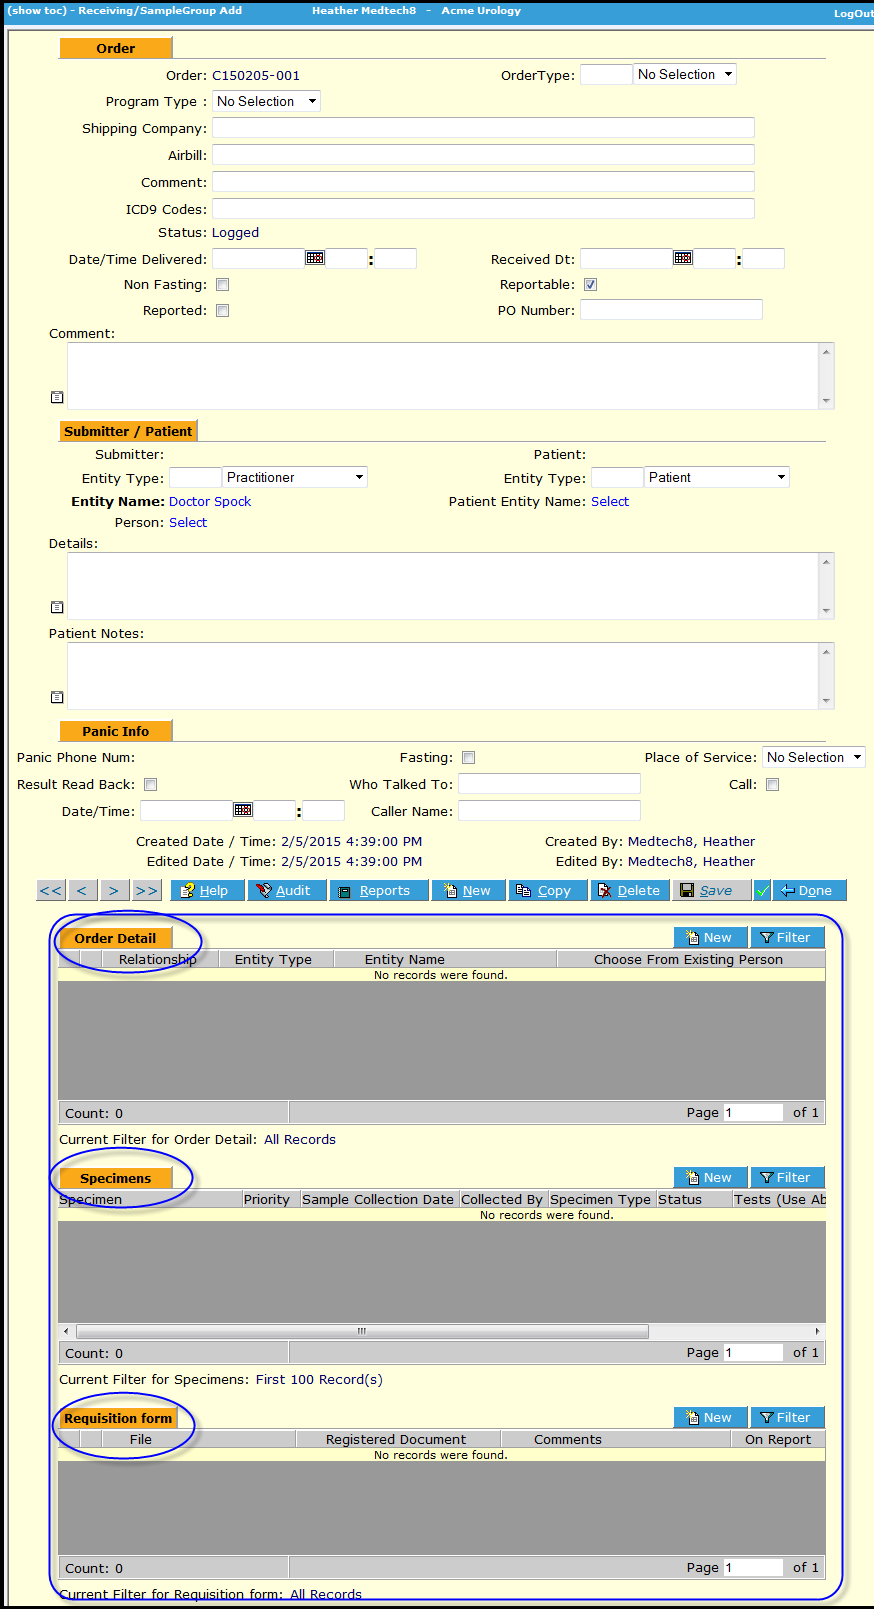
When an order is entered, upon saving, several additional frames display on the Order Detail screen.
These frames, or areas, include:
- Order Detail - This area allows the user to specify parties who are to receive invoices or copies of reports.
- Specimens - This is the area where specimens to be tested are defined. The list displays the current status and other details of each.
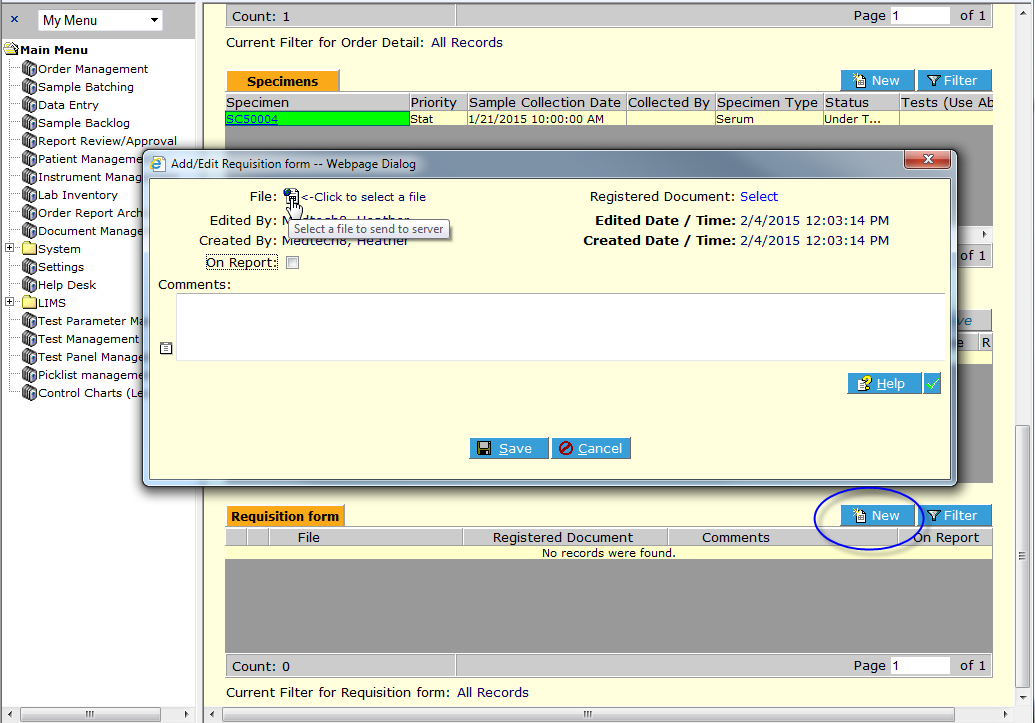
- Requisition form - Any paper forms may be scanned and uploaded to this list, or any other files you want to associate with the order.
To add Order Details (Report Copy directions and/or Invoicing info)
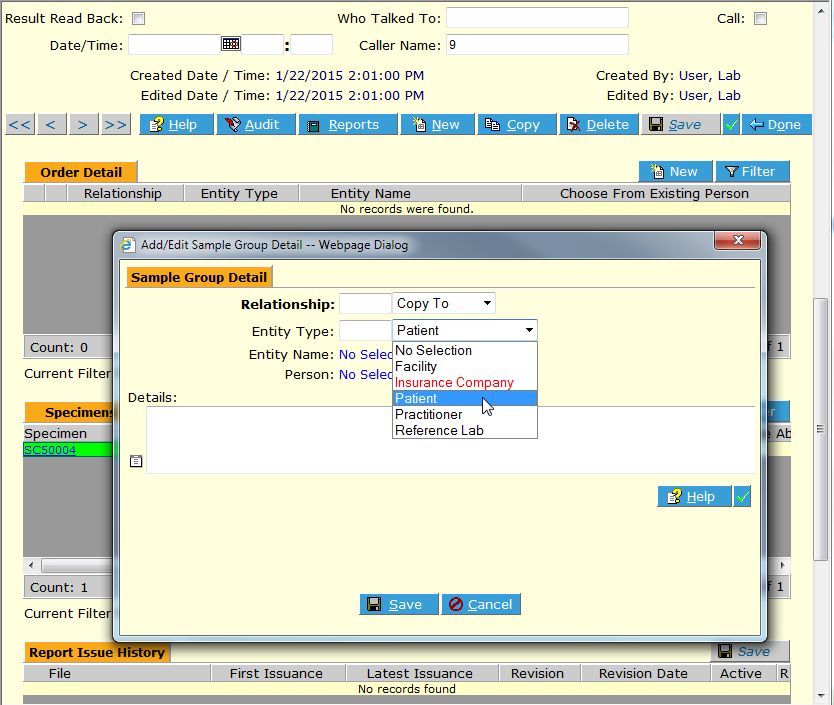
If Report copies or invoices are to be sent to particular people, select the appropriate choices in the dialog box that displays upon pressing the Order Detail New ![]() button.
button.
The Add/Edit Sample Group Detail popup dialog appears
To Add Samples/Specimens
The Specimens frame is the area where all samples to be analyzed for the Order are defined and listed.
Click the New ![]() button on the Specimens frame menu.
button on the Specimens frame menu.
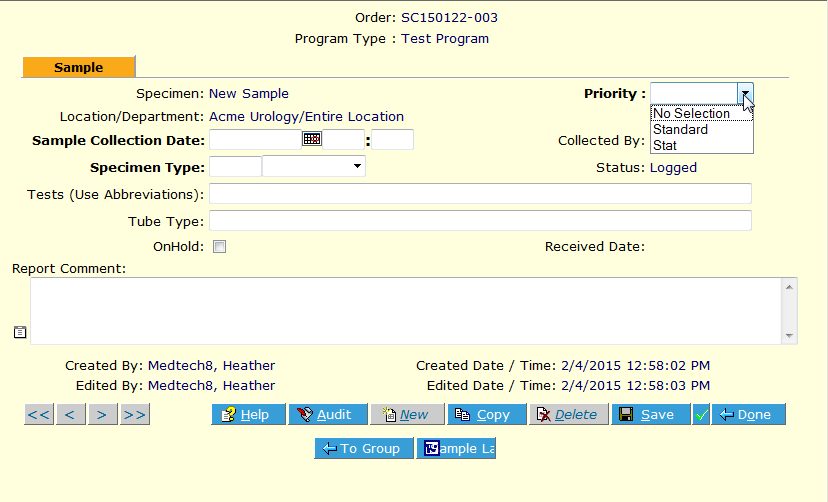
The New Sample screen displays.
The only required fields are Sample Collection Date, Specimen Type and Priority. Fill in as much information as you need or have available. Any identifying ID number the submitter uses can be added to the Comments section. If there is some reason the sample should not be processed yet, check the On Hold box and provide comments. The specimen will be unavailable for testing until released from hold.
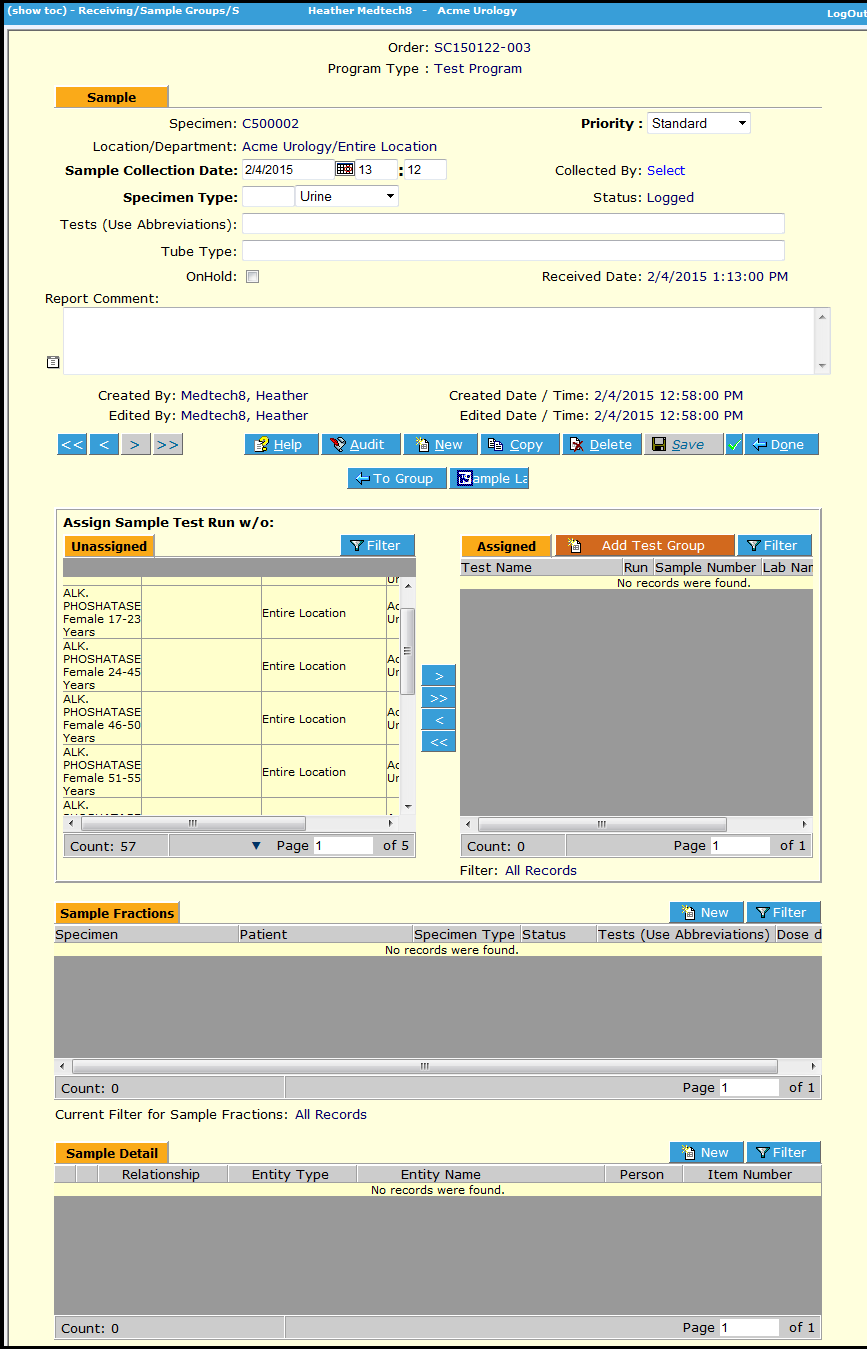
Once saved, the system assigns a unique Sample ID, and the Test Assignment, Sample Fractions and Sample Detail frames display.
Assigning Tests
Selection of Specimen Type filters the list of tests displayed for assignment. Authorized users may assign/unassign tests as needed.
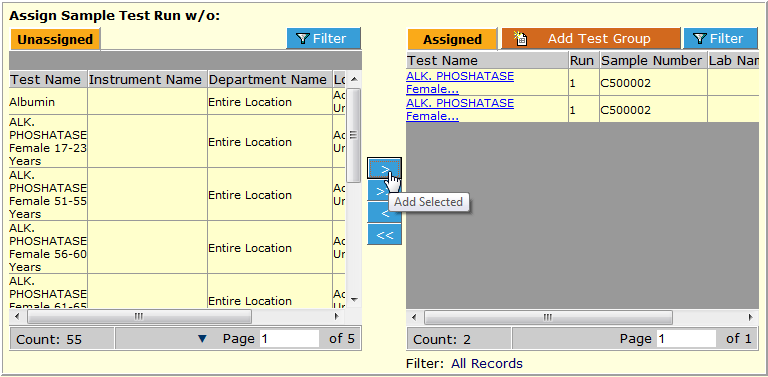
On the Assign Sample Test Run w/o: frame of the Sample Detail screen displayed after creating or importing a new sample, click on the test(s) you wish to assign and click the Add Selected ![]() button. Alternatively you can use the Add All
button. Alternatively you can use the Add All ![]() button.
button.
Selected test(s) are assigned to be run.
If a desired test does not appear in the list on the left, you can use the filter. Reset it as described in the Filter description earlier, and then search using desired criteria. If it still doesn't show, check that (a) the correct Specimen Type has been selected, and/or (b) the test is set up correctly for that specimen type and user, and is Published and Active. If you wish to remove test runs, simply select and use the Remove Selected ![]() or Remove All
or Remove All ![]() button.
button.
To Add Sample Fractions
Sample fractions, or aliquots, may be added easily.
Click the New ![]() button on the Sample Fractions frame.
button on the Sample Fractions frame.
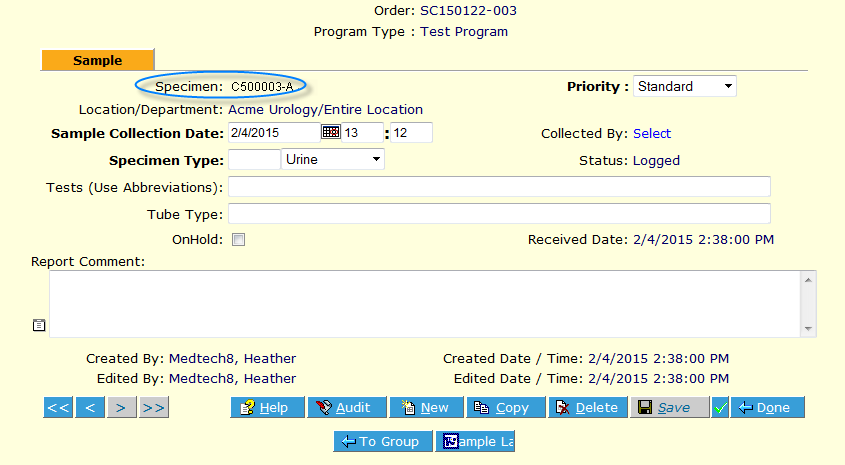
A new sample is created as a fraction of the parent sample, and the system automatically gives it a unique ID that relates to the parent sample.
Continue just as in the case with any other sample. The system will track the fraction and keep its relationship with the parent sample.
To Add Requisition Form or Other Files to an Order
Click the Requisition form New ![]() button on the Order Detail page. The Add/Edit Associated Files dialog displays.
button on the Order Detail page. The Add/Edit Associated Files dialog displays.
If the file you wish to associate is already saved in the LIS then select it from the Registered Documents. Otherwise, use the File Selection icon to locate a file stored somewhere on your computer or on the local area network (LAN).
Once selected, click Send to Server. The file is now associated with the Order and listed in the frame.
Auditing
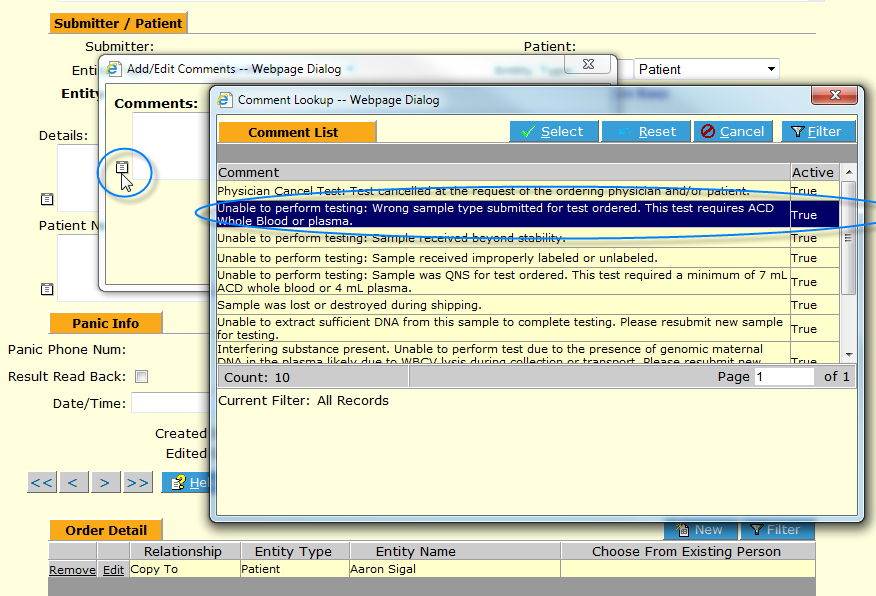
The Order screen is an audited page, which means that once initially created, any time you Save in the main section, a dialog box pops up and requires a comment. This may be either typed in or selected from the preset list.
Audit Dialog Popup
Select Preset ("Canned") Comment
The initial value (this may be blank) and the new value are saved to the system Audit Trail records along with the reason/comment, date/time and user information.
Authorized users can view audit records by clicking the Audit ![]() button, and if desired, the list can be filtered and/or exported to Excel using the Export
button, and if desired, the list can be filtered and/or exported to Excel using the Export ![]() button.
button.
