LabLynx KB:ELab 7 user manual - sample batching
Batching Overview
Since all Test Results can be entered in a batch fashion, this area of the system is the first step in allowing users to group sample tests together for batch or group entry. LabLynx enables you to group one or more sample test runs into a Batch, or Process Group, for adding QC samples and tests, and for data entry. In ELab, the terms Process Group and Batch are synonymous.
You can add and edit sample tests in a process group until the test results are approved for a process. You can also link quality control to a batch, so that all results in the batch are related to their respective QC, and you can also link inventory items to the batch.
Key Points about Batching (Process Grouping)
▪ A batch can only be created for a specific Location/Department and unique Process combination.
▪ The sample must have been received to begin sample processing.
The Process Grouping/Batching function is greatly impacted by the test setup details. If you do not see what you expect to see, review how you set up the test, including:
▪ Test Users
▪ Path Assignment
▪ Process Definition for the Assigned Path
The Process Group Details screen allows users to provide the necessary filtering criteria for the system to query the database for Sample Tests meeting the provided criteria.
Users provide primary criteria for the purpose of being displayed with a list of Sample Tests that are appropriate to be batched together based on testing and security definitions. The user will be displayed two hyperlinks requiring definition: Department Name and Process Name.
The user should first define the Department Name – whereupon the system can filter the available list of Processes. The list of available Departments is based on whether or not the user has access to them. Once selected, the user defines the Process name to group Sample Tests.
The system will display only those Processes that have Sample Tests ready for batching for users with the appropriate access.
To Add or Edit Process Groupings (Batches)
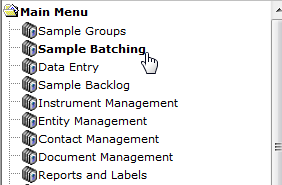
Navigate to the Batching menu item (normally second or third menu item).
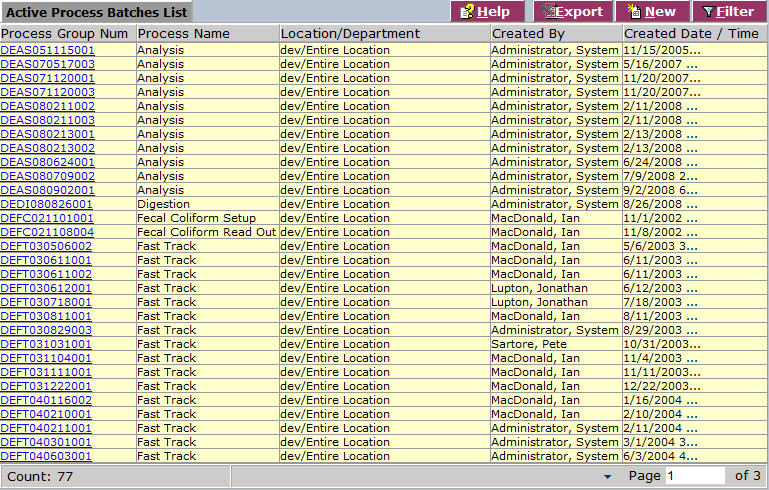
The Active Process Batches list screen displays LIMS Active Process Batch information currently defined in the system (you may have first been displayed the system filter to narrow the list. You can click OK ![]() to view all. Clicking Cancel will bring back zero records).
to view all. Clicking Cancel will bring back zero records).
From the Active Process Batches List, select a Process Group or click New. If you select New, the system displays the Process Group Details screen.
Complete the fields of the Process Group Details screen. Bold fields are required.
- Department Name - Click the link to select a Department Name from the Lab Look Up (by Location & User) List.
- Process Name - Click the link to select a Process Name from the Active Processes (filtered by User) List.
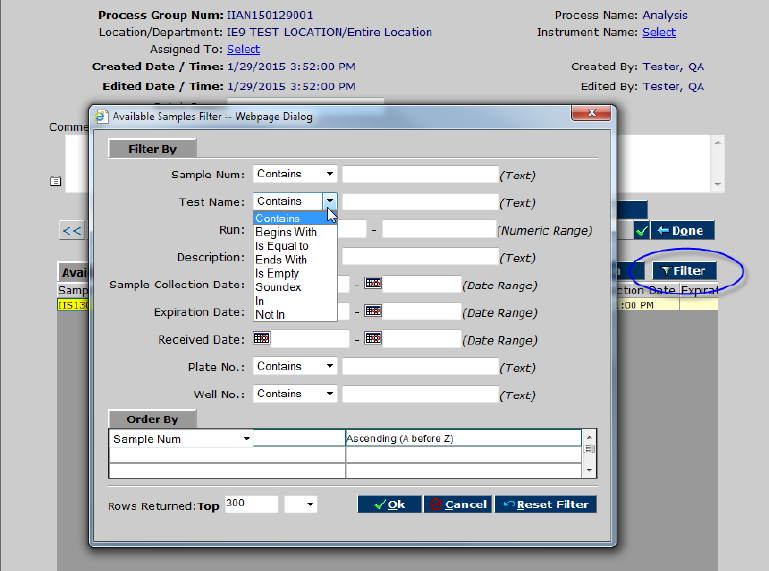
Click Continue ![]() . Note: The Available Samples list can be quite large. Your system may be set to automatically display the filter so users can immediately narrow the list using appropriate criteria.
. Note: The Available Samples list can be quite large. Your system may be set to automatically display the filter so users can immediately narrow the list using appropriate criteria.
Filter according to your needs or simply click OK ![]() to dismiss the filter (in which cases all records will be returned).
to dismiss the filter (in which cases all records will be returned).
Note: Throughout the LIMS, wherever you use the filter, remember that it is generally preset to bring back a limited number of records so that it doesn't accidentally tie up the system looking through many thousands or millions of records. If you don't see the records you expect, check filter criteria settings
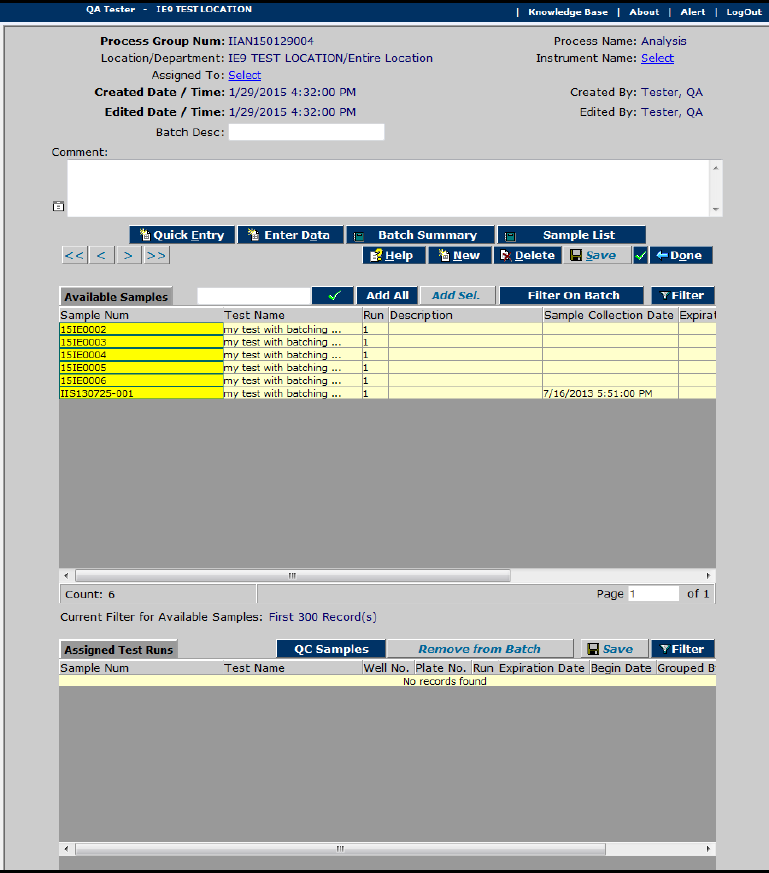
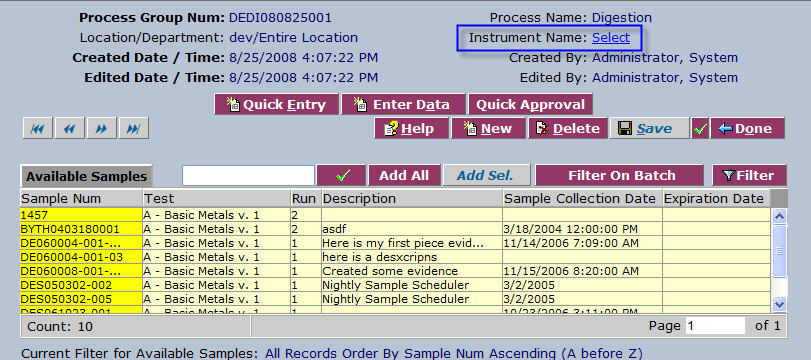
The Process Detail screen is now displayed.
The obvious purpose for Process Groups is to allow for results entry for a large number of samples at one time. Other purposes include capturing quality control data for the group and mimicking the production groups of samples. This Create/Edit Process Batch screen is likely the most important screen in the system with respect to routine daily operations. In addition, this screen has the greatest amount of functionality embedded into it, so please read the following information carefully, as a lot of information will be presented:
To gain access to this screen the user must have selected one of two options:
- Selected an already existing Process Group or
- Clicked the New
 button and selected a Department and Process combination.
Now click the Instrument Name link to select an Instrument from the Instruments Lookup List and designate that instrument as the one used for this batch.
To Add or Edit Samples in a Process Group (Batch)
From the Available Samples area on the Process Creation Detail screen, you can select individual Sample Test Runs from the list, whereupon the Add Sel. ![]() Button appears. Click it to add the selected samples to the batch, or click the Add All
Button appears. Click it to add the selected samples to the batch, or click the Add All ![]() button to add all of the Sample Test Runs in the Available Samples list.
button to add all of the Sample Test Runs in the Available Samples list.
The selected samples are added to the Assigned Test Runs area when you click one of the Add buttons.
Note: Icons ![]() appear to the left of each sample, enabling certain actions: Create New Test Run, Add QC Test and Cancel Test Run.
appear to the left of each sample, enabling certain actions: Create New Test Run, Add QC Test and Cancel Test Run.
To Remove a Sample Test Run From a Batch
From the Assigned Test Runs area on the screen, click a Sample Test Run to select and highlight it.
Click Remove from Batch. The system removes the selected Sample Test Run from the Batch.
To Add a Quality Control (QC) Sample
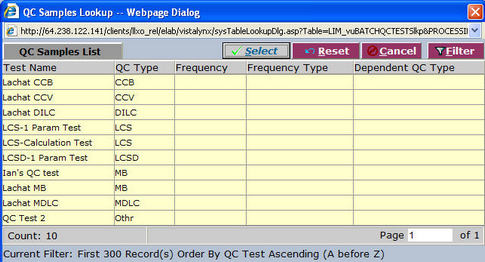
From the Assigned Test Runs area, click the QC Samples ![]() button to display the QC Samples that can be added to this batch. The list is filtered out by the QC samples that have been created for the Tests assigned to the batch. The system displays the QC Samples Lookup List.
button to display the QC Samples that can be added to this batch. The list is filtered out by the QC samples that have been created for the Tests assigned to the batch. The system displays the QC Samples Lookup List.
Select a QC Sample or multiple QC Samples and click Select ![]() . The system adds the selected QC Samples to the Batch.
. The system adds the selected QC Samples to the Batch.
To Re-Order Sample Test Runs
From the Assigned Test Runs area on the Process Group Details screen, click the 123… (Sequence) field for the Test Run you wish to re-order. Type the number that corresponds to the order in which you would like the Test Run to occur.
To Add a New Run, Add a QC Test or Cancel a Run
From the Assigned Test Runs area, click an icon to perform one of the following actions:
