LabLynx KB:Healthcloud POL user manual - data entry
Data Entry Overview
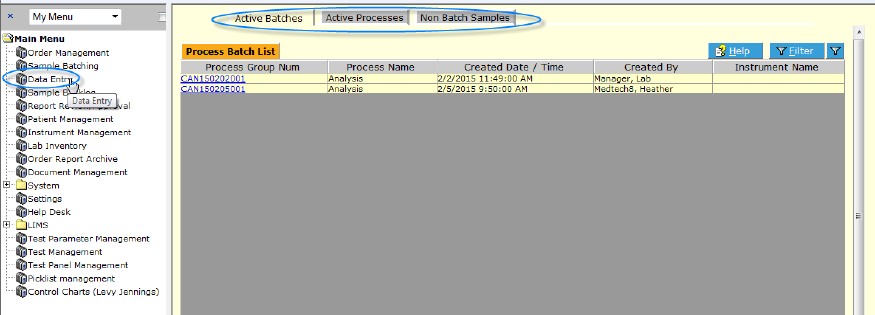
Any Sample Groups/Batches (or Non-Batch Samples) in any process step are displayed on the Data Entry list screen. These are displayed in three ways via three tabs:
- Active Batches - This is the default tab displayed, showing all batches the user has profile access to view, by Process Group Number (Batch Number) showing which process the batch is for, created date/time, who created it and which (if any) instrument is associated with it.
- Active Processes - All batches the user has profile access to view, by Process showing Process Group Number (Batch Number), created date/time, who created it and which (if any) instrument is associated with it.
- Non Batch Samples - This is a list of samples whose assigned test includes the non-batching process (they are processed individually). The list displays sample number, specimen type, status and patient name.
Results may be entered manually by selecting the desired batch and then proceeding as described in this section. Results may also be entered automatically if instruments are interfaced with the LIMS.
To Enter Test Results
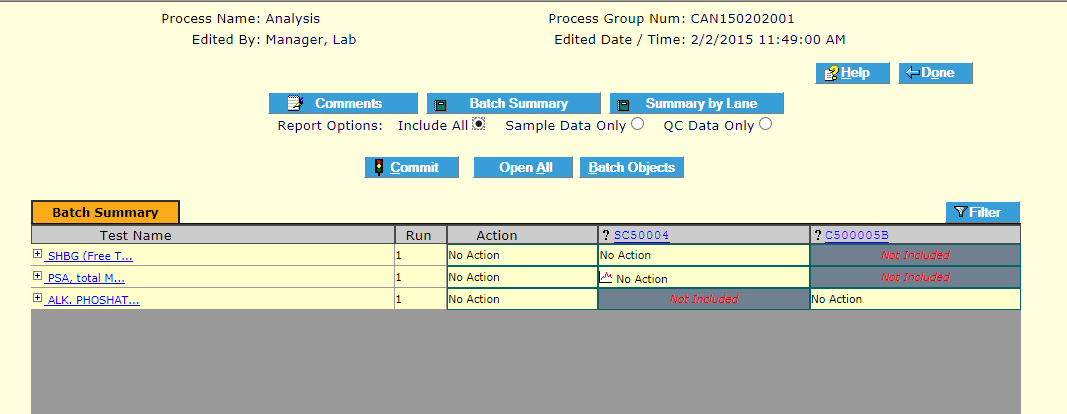
On the Data Entry list screen (main screen displayed by choosing Data Entry menu item), click on the batch that contains the samples for which you wish to enter data. If necessary, use the Filter to find it. The Batch Result Entry screen displays.
There are two ways to enter results data manually: (1) by Test and (2) by Sample.
To Enter Results by Test
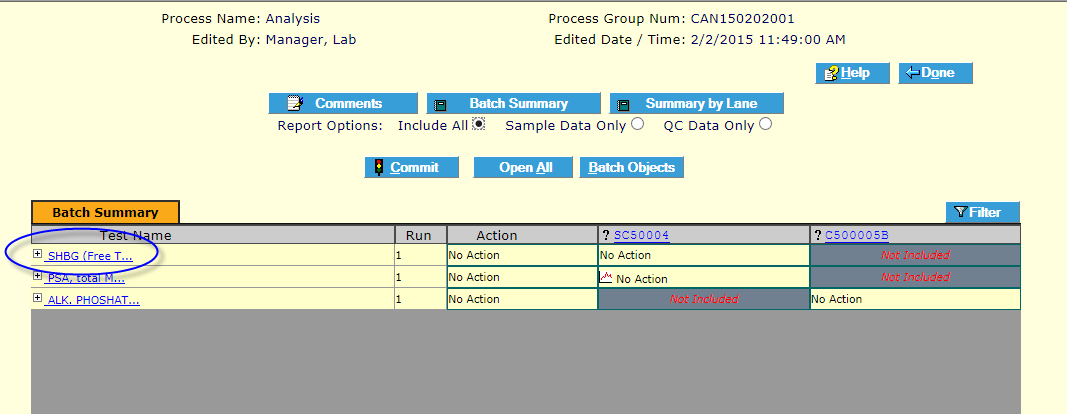
On the Batch Results Entry screen, click on the Test for which you would like to enter results (this will display all Samples assigned that Test).
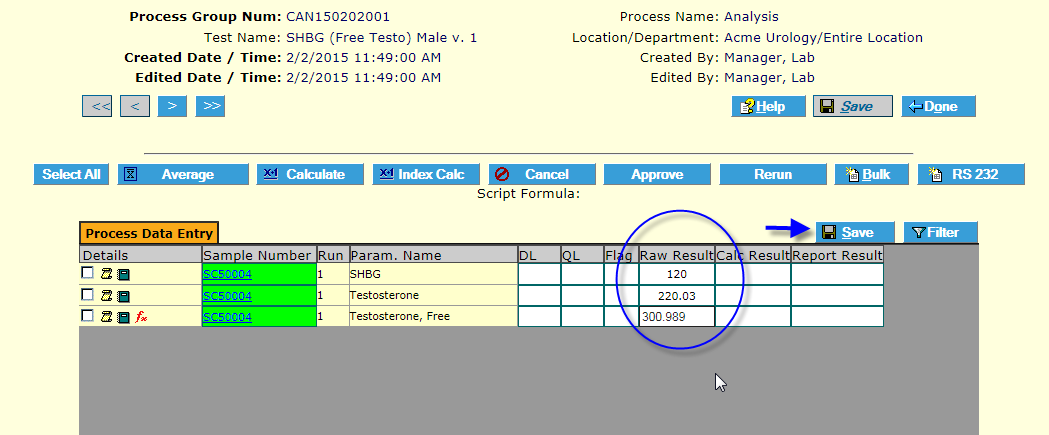
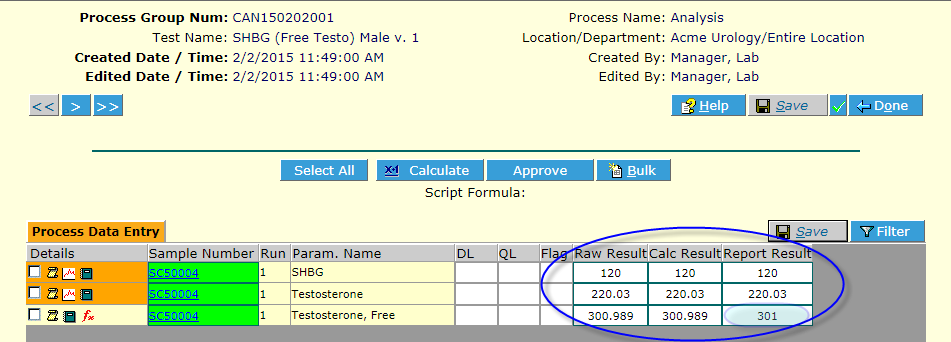
The Process Data Entry by Test screen displays. Enter data into Raw Results column for all desired samples.
Click Save ![]() . The LIS populates Calc and Report results and displays according to pre-defined sig figs and resolution.
. The LIS populates Calc and Report results and displays according to pre-defined sig figs and resolution.
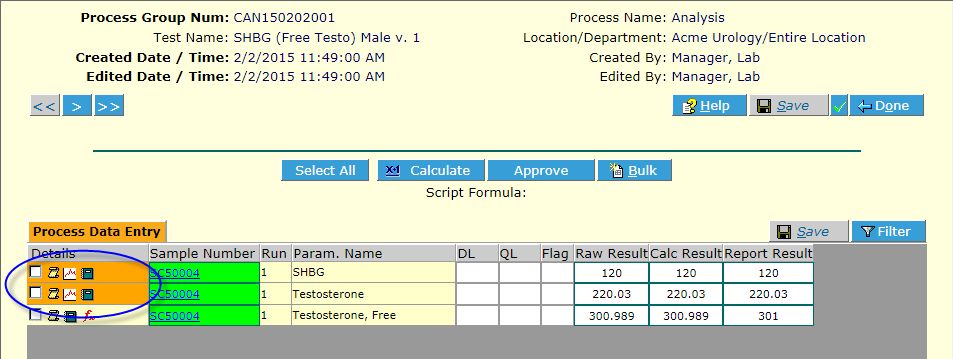
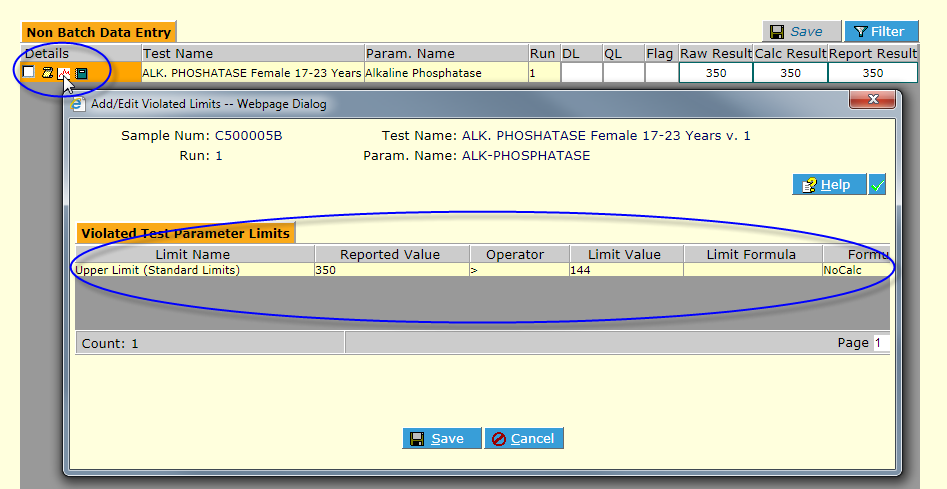
- NOTE: If any results are out of the pre-defined parameter range, the icon column will change color and the LIMIT EXCEEDANCE icon will display:
Out-of-range alerts
Hovering over the icon displays information about the exceedence. Additional information can be viewed by clicking the icon.
If any results have calculations associated with them, select them (click their checkbox) and click Calculate ![]() button to display calculated values.
button to display calculated values.
Select all sample runs whose results are satisfactory and click Approve ![]() . The selected samples are moved to be available for the next Process and no longer display.
. The selected samples are moved to be available for the next Process and no longer display.
To Enter Results by Sample
On the Batch Results Entry screen, click on the Sample for which you would like to enter results.
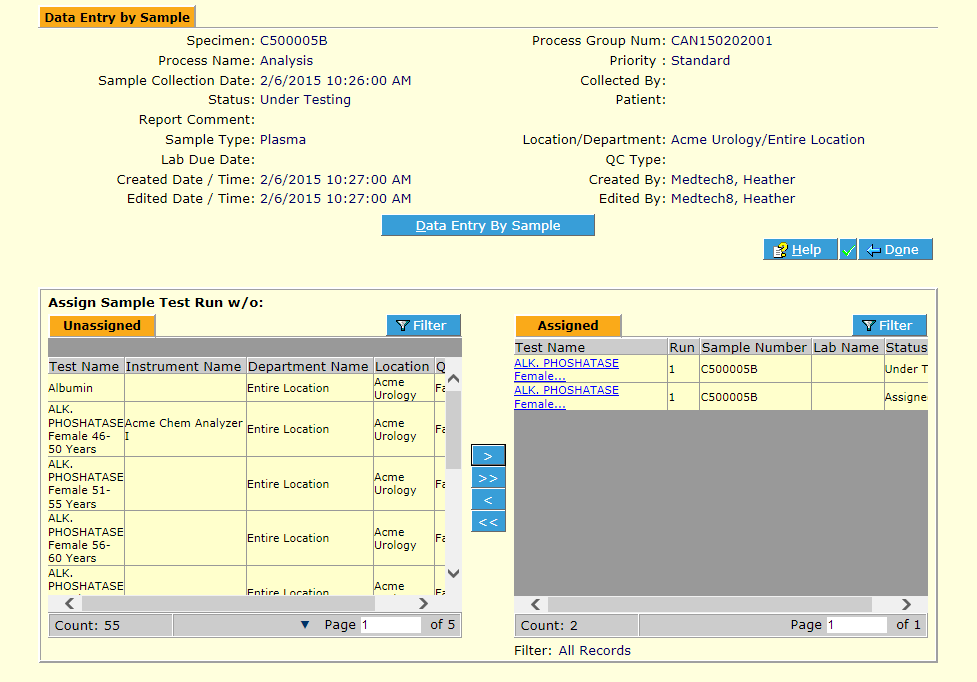
The Data Entry by Sample screen is displayed. This will display all Tests assigned to that Sample. *Note: Authorized users may add or delete tests here even at this stage if necessary.
Click the Data Entry By Sample ![]() button. The Sample Data Entry screen is displayed.
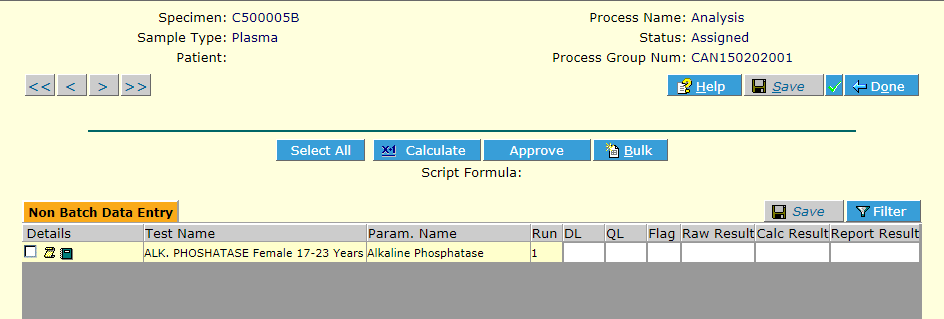
button. The Sample Data Entry screen is displayed.
Enter results in the Raw Result column for the tests for which you have results, and click Save ![]() .
.
If any results are outside of pre-defined parameters, a color-coded alert and icon will display. Hovering over the exceedence icon will display information about the exceeded limit.
Limit Violation
Hovering over icon will display more information about the limit.
Clicking the icon will display still more information about the limit.
To Complete Results Entry
Once data are entered and saved for all specimens and tests, click Commit ![]() . The results no longer display and the specimens are complete for that batch.
. The results no longer display and the specimens are complete for that batch.
Results Review
To Approve/Rerun/Cancel Results
Results may be approved, sent for re-test (another run created) or canceled (discard results). In the Batch Result Entry screen (accessed by clicking on a batch in the Data Entry list screen), click the Open All ![]() button.
button.
All Tests and Samples are displayed with each parameter shown.
Normally one or more Process steps of Review are created and added to a Path which is assigned to a given test and then assigned to appropriate specimens - and approval review is done in that process batch. However, it may also be done for any batch regardless of process step.
Results can be approved, sent for re-test (another run created) or canceled (discard results) either by individual sample for a given test (all analytes/parameters in that test), individual specimen for all tests including all analytes/parameters, or by individual analyte/parameter or for an entire test (all specimens in that batch).
To Approve, Send for Rerun or Cancel by Specimen/All Analytes, Single Test
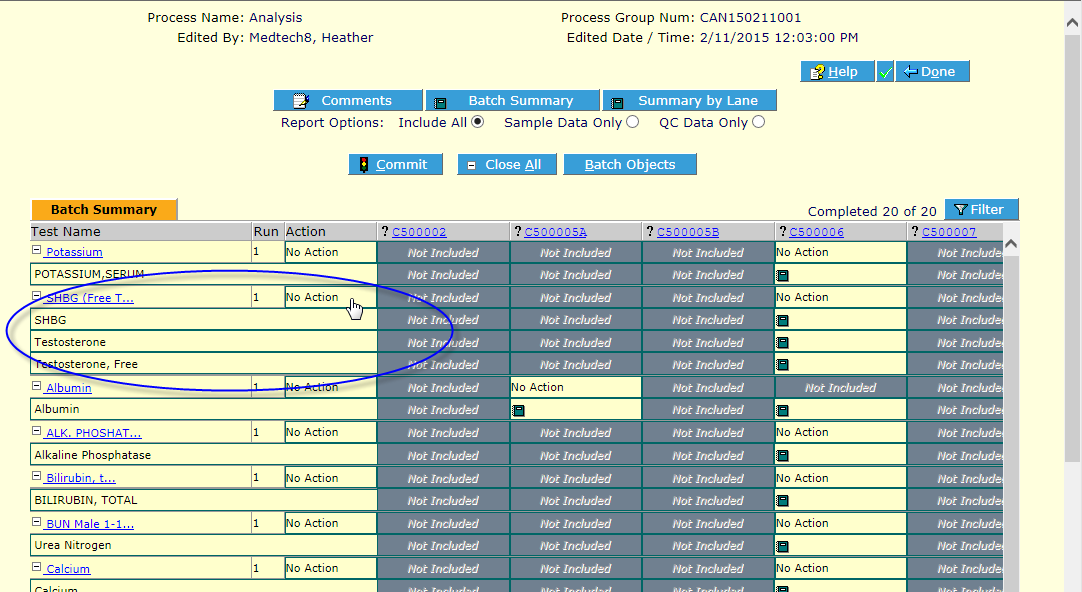
To Approve, click ONCE in the yellow background area of the cell immediately below the Specimen Number where it says "No Action":
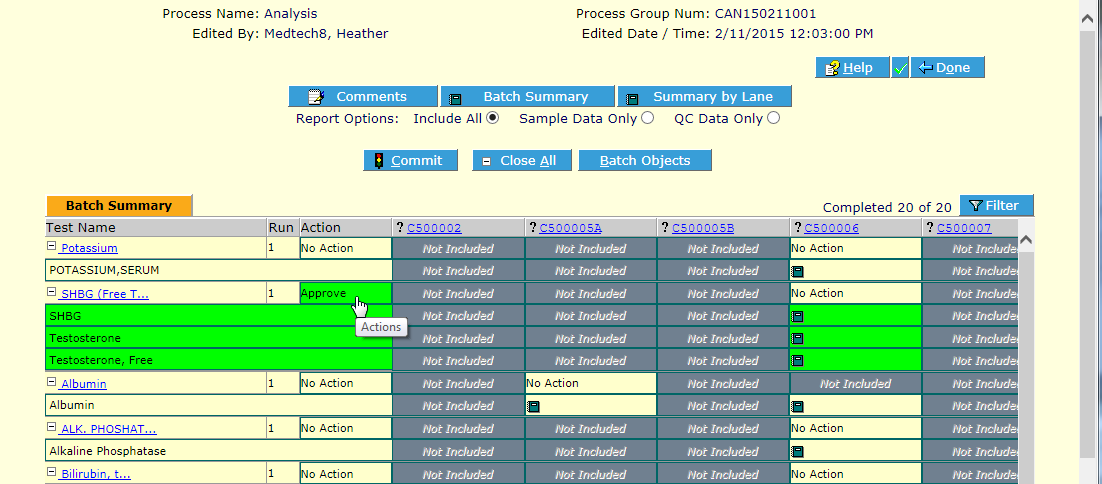
The Results for that specimen for that test all turn green and the word "Approve" displays.
Click the Commit ![]() button to finalize.
button to finalize.
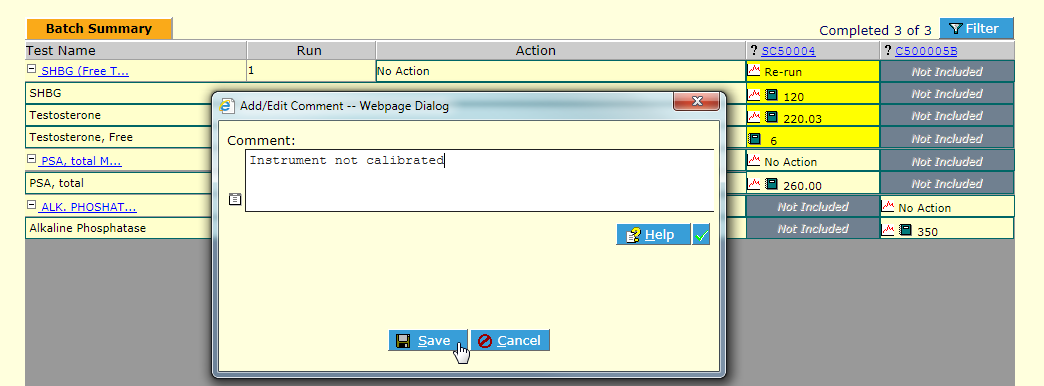
To Send for Re-Test/Rerun, click TWICE in the yellow background area of the cell immediately below the Specimen Number where it says "No Action":
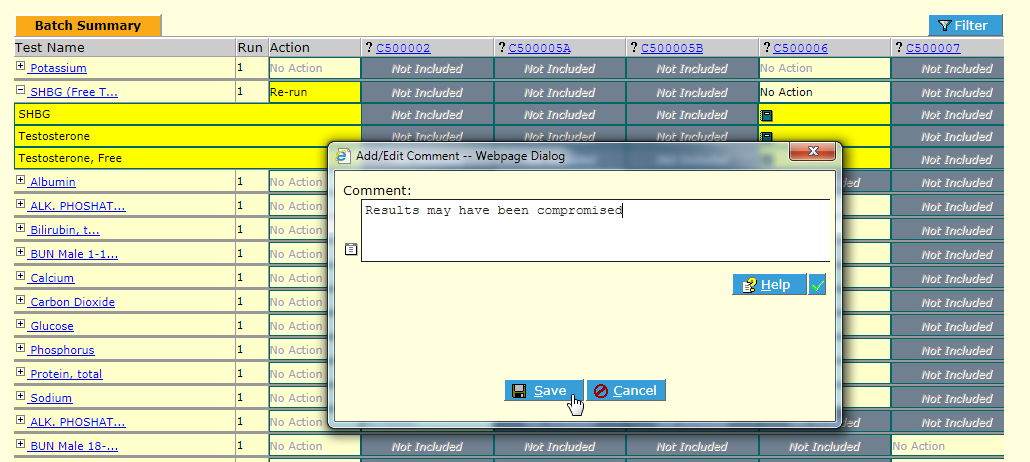
The Results for that specimen for that test all turn yellow and the word "Re-run" displays.
Click the Commit ![]() button to finalize.
button to finalize.
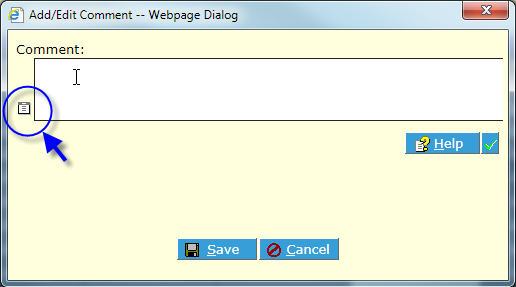
Since result changes are audited for regulatory compliance purposes, the Add/Edit Comment dialog popup requires a reason be entered:
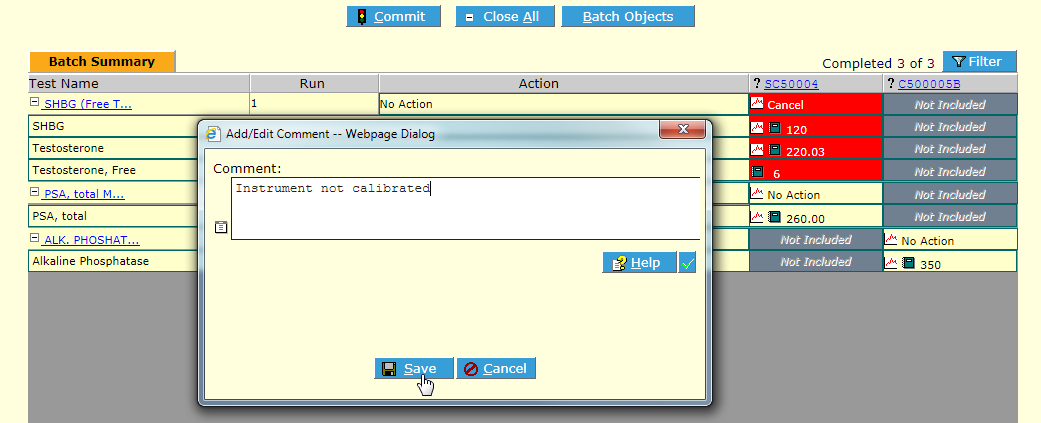
To Cancel Run, click THREE TIMES in the yellow background area of the cell immediately below the Specimen Number where it says "No Action":
The Results for that specimen for that test all turn red and the word "Cancel" displays.
Click the Commit ![]() button to finalize.
button to finalize.
Since result changes are audited for regulatory compliance purposes, the Add/Edit Comment dialog popup requires a reason be entered:
The sample run is canceled and you may complete the remaining items in the batch.
To Approve, Send for Rerun or Cancel by Specimen/All Analytes, All Tests in the Batch
Follow the directions in #To Approve, Send for Rerun or Cancel by Specimen/All Analytes, Single Test above, except instead of clicking in the area under the Specimen Number, click on the question mark symbol (?).
To Approve, Send for Rerun or Cancel by Test/All Analytes, All Specimens in the Batch
Follow the directions in #To Approve, Send for Rerun or Cancel by Specimen/All Analytes, Single Test above, except instead of clicking in the area under the Specimen Number or on the Question Mark, click in the Action column for the appropriate Test row (where it says "No Action").
Clicking once approves that test (including all analytes/parameters) for all specimens it is assigned to:
To create another run or cancel, click twice or three times, respectively, then click Commit ![]() button to finalize.
button to finalize.
If approving, the test results are initially approved (there may be additional review steps in the Test Path, however) and it disappears from the batch, ready for its next Process step in its Path.
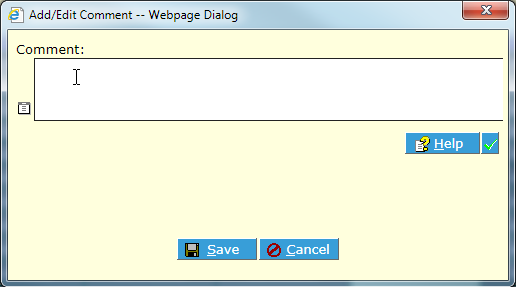
As with all Re-runs or Cancels, since result changes are audited for regulatory compliance purposes, the Add/Edit Comment dialog popup requires a reason be entered:
To Add Report Comments
To add comments you would like displayed on the report for a batch, click the Comments ![]() button, then add whatever comments you would like in the popup text area (*Note: Make sure popup blockers are off).
button, then add whatever comments you would like in the popup text area (*Note: Make sure popup blockers are off).
Note: You can add pre-defined or "canned" comments by clicking the icon.
Batch Summary Report
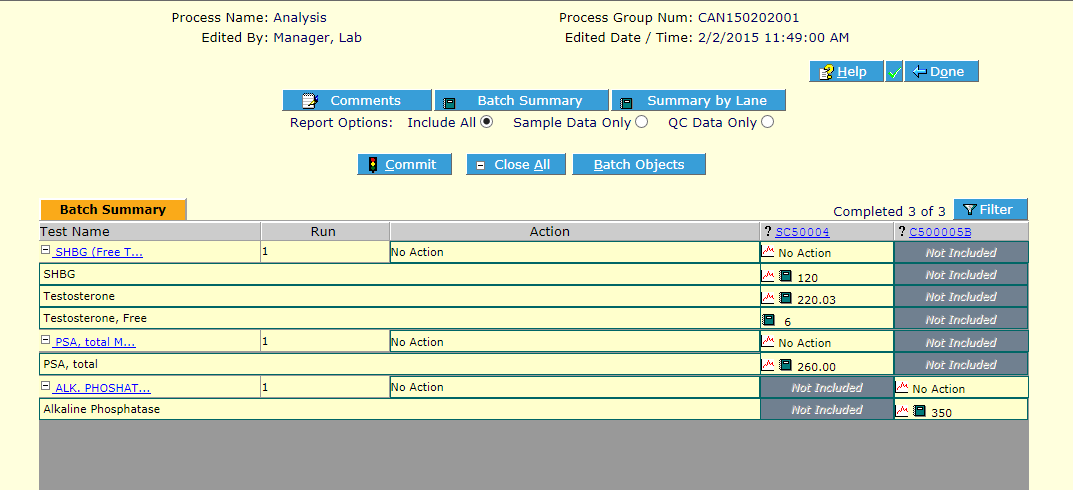
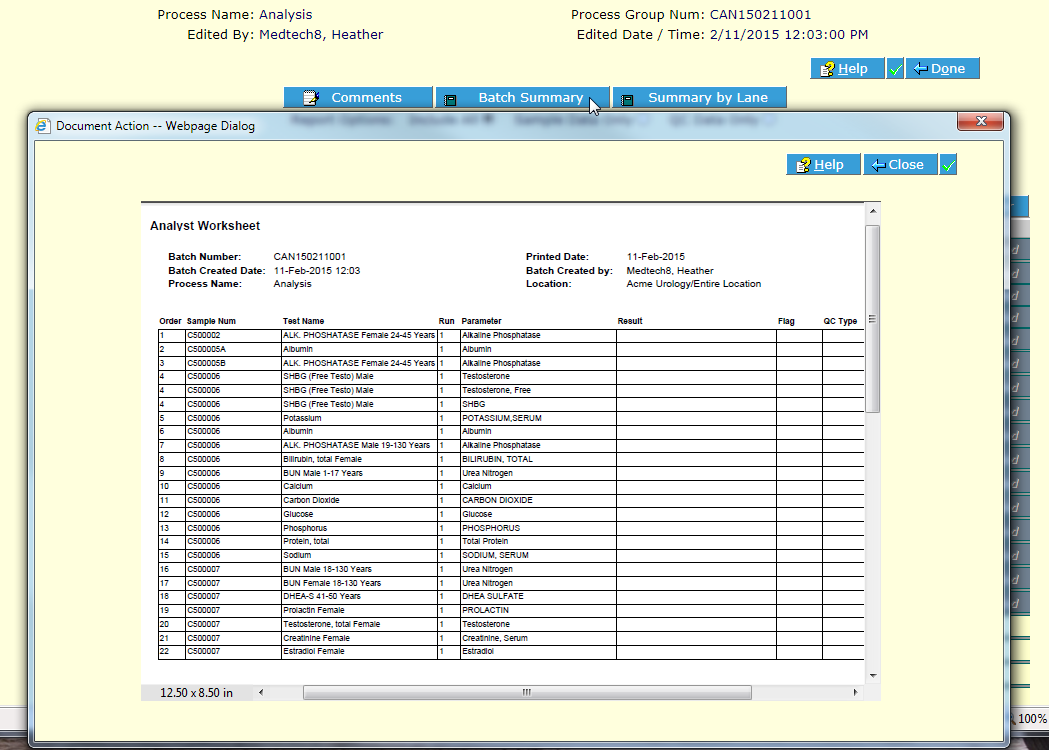
Users can quickly generate a Bench Worksheet in the Batch Results Entry screen by clicking the Batch Summary ![]() button.
button.
Batch Summary or Bench Worksheet Report
This may be printed and used by the technician to keep track of any manual results or other data. Any data already present for items in the batch will be pre-populated on the sheet, along with user, date, process, batch, etc.
