LabLynx KB:Healthcloud POL user manual - sample batching
Sample Batching Overview
For any orders for which all samples have been received and none are on hold, their samples are available to be batched into a Process Group (Batch). Typically this may be either a Prep process or an Analysis process. Specimens may be batched for any process defined in a test. For instance, Test A includes three processes before it is deemed Complete and reportable:
- Prep
- Analysis
- Review
You can create a batch/process group for the Prep process as soon as one or more specimens have been received, and add them to that batch/process group. Then, once data have been entered for all specimens in that group (in this case, probably a result of "performed", "done" and/or a date/time), then the batch is complete, it falls off the list of batches and its specimens are all available for the next process - in this example Analysis. The same process occurs and then a Review batch is created and its specimens' results reviewed and approved/sent for re-run or canceled. Once all specimens are completed for all processes, they show up in the report.
Before you can batch tests, here are the items that must be done:
- Create Sample Types
- Create Location (This will probably have already been done for you)
- Create Departments – and assign to Location
- Create Paths - and assign to Tests
- Create Processes – and assign to Paths
- Create Parameters – or make sure ELab already contains the ones you need. Define limits, etc. if necessary
- Create Tests – must include at least one Parameter, and path with at least one process, or the LIMS will not allow batching
Keep in mind:
1. Users must have access to locations, departments, tests etc.. Best practice is to allow all users at first (when defining a test), then narrow access once you know it all works properly.
2. Samples must have correct Sample Type selected, be Received, be in the same Location and not be On Hold in order to be available for batching.
To Create a New Sample Batch
In the Sample Batching screen, click the New ![]() button.
button.
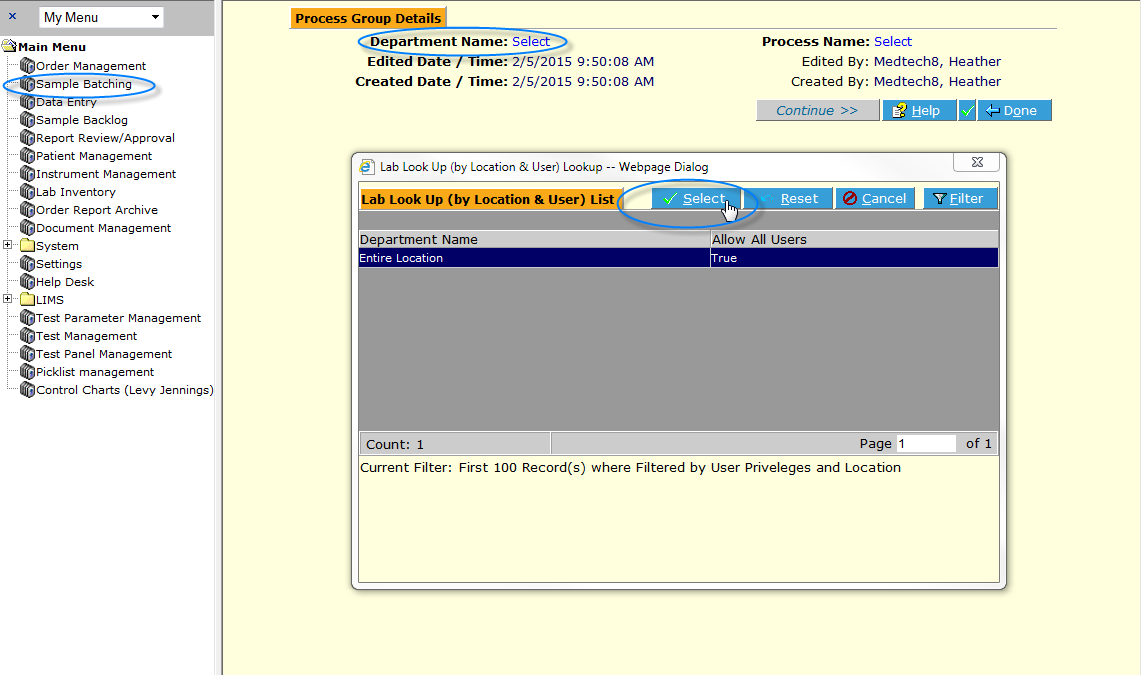
Select the Department Name.
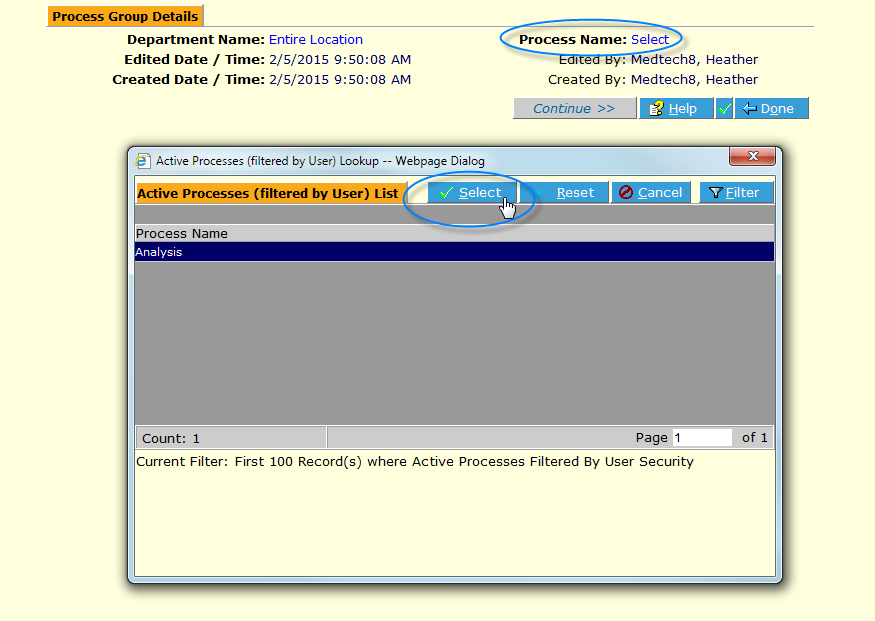
Select the Process Name.
Click the Continue ![]() button. The Batch, or Process Group screen is displayed. It is automatically assigned a unique ID number, according to lab protocol (this is configured at setup).
button. The Batch, or Process Group screen is displayed. It is automatically assigned a unique ID number, according to lab protocol (this is configured at setup).
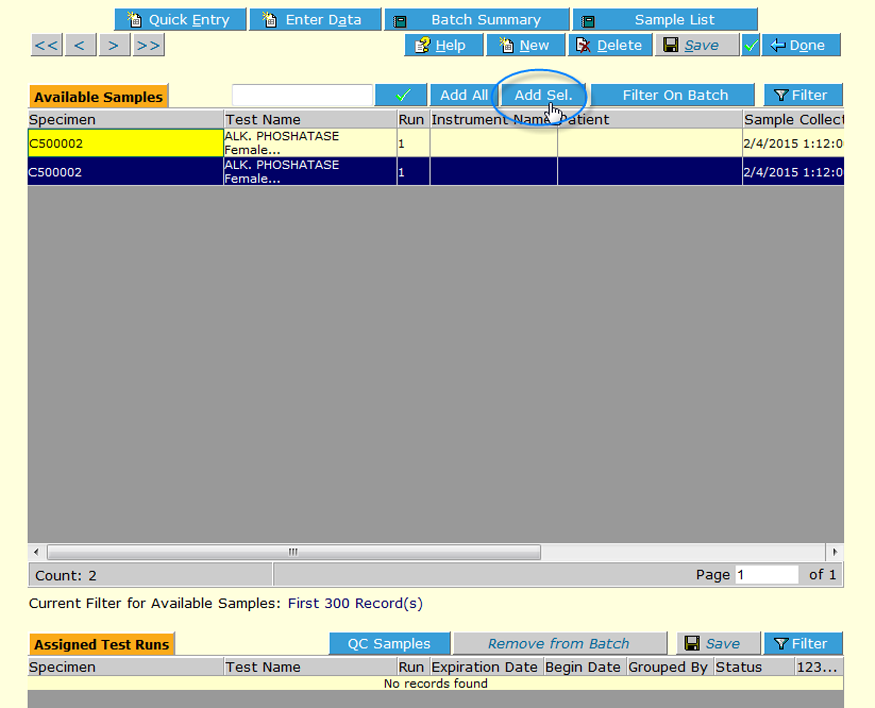
All samples in the Location that are Received, not On Hold and thus available for batching are displayed. Click on the samples to be batched for this Analysis Batch, and click Add Sel. (Add Selected) ![]() or click Add All
or click Add All ![]() .
.
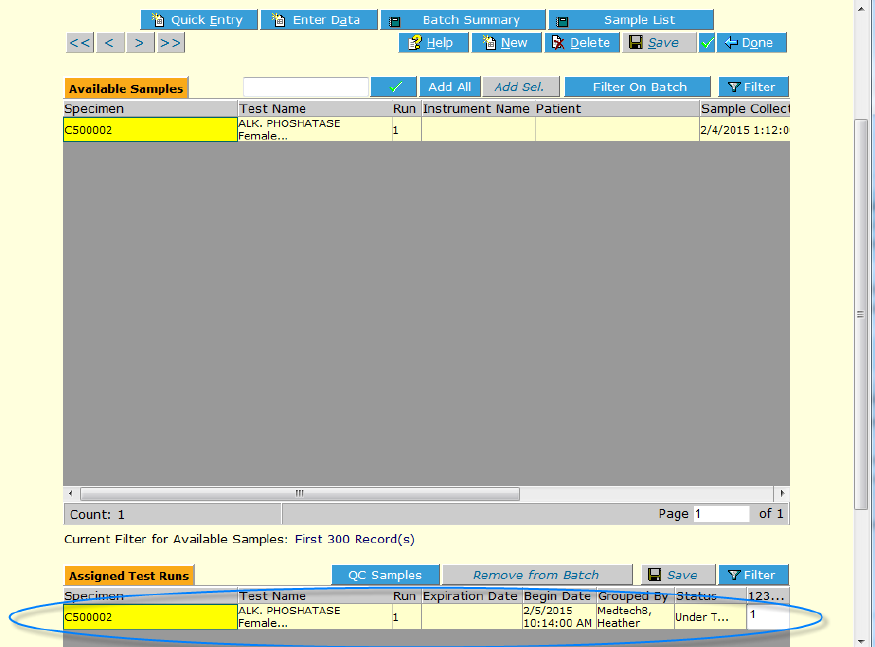
The Sample(s) is/are displayed in the Assigned Test Runs frame below.
If there are QC or Control samples defined in the system, they may be added by clicking the QC Samples ![]() button and selecting.
button and selecting.
It is not necessary to Save.


