LabLynx KB:ELab 7 user manual - sample receiving
Sample Receiving Overview
ELab enables you to log in and receive single samples, as opposed to sample groups or orders/projects - although they also may easily be associated with a project or other group/category/entity etc. In the Sample Add/Edit screen users can enter and edit sample information. This can include specific information like collection data, sample point data, disposal data, comments, test assignments and applications.
For a demonstration of Sample Receiving in ELab, see:
![]() Sample Receiving (http://files.mylablynx.com/share/eBooks/Movies/d140/d140.html)
Sample Receiving (http://files.mylablynx.com/share/eBooks/Movies/d140/d140.html)
To Add or Edit Samples
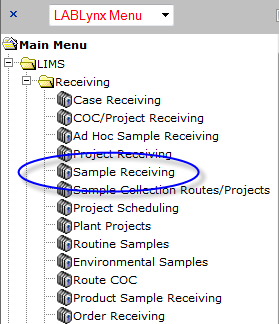
Navigate to the Sample Receiving menu item. This will usually be the top menu item if your lab primarily receives samples singly, or else it can be found in the master LabLynx Menu in the LIMS/Receiving folder.
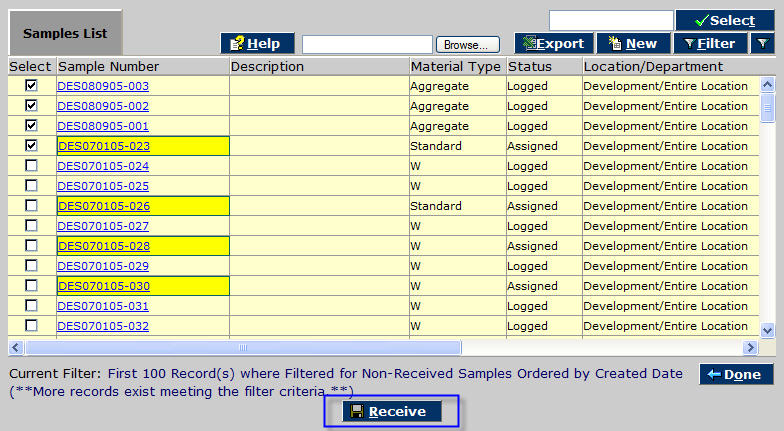
The Samples List screen displays all samples in the system, with the filter defaulted to show only those samples not yet received.
'Note: Samples are color-coded: Yellow = Test(s) Assigned, Green = Under Testing, Grey = Complete.'
To log a sample as "Received", the user selects it and clicks the Receive ![]() button, whereupon it will drop from the pre-filtered list. See #To Receive Samples below for detailed instructions.
button, whereupon it will drop from the pre-filtered list. See #To Receive Samples below for detailed instructions.
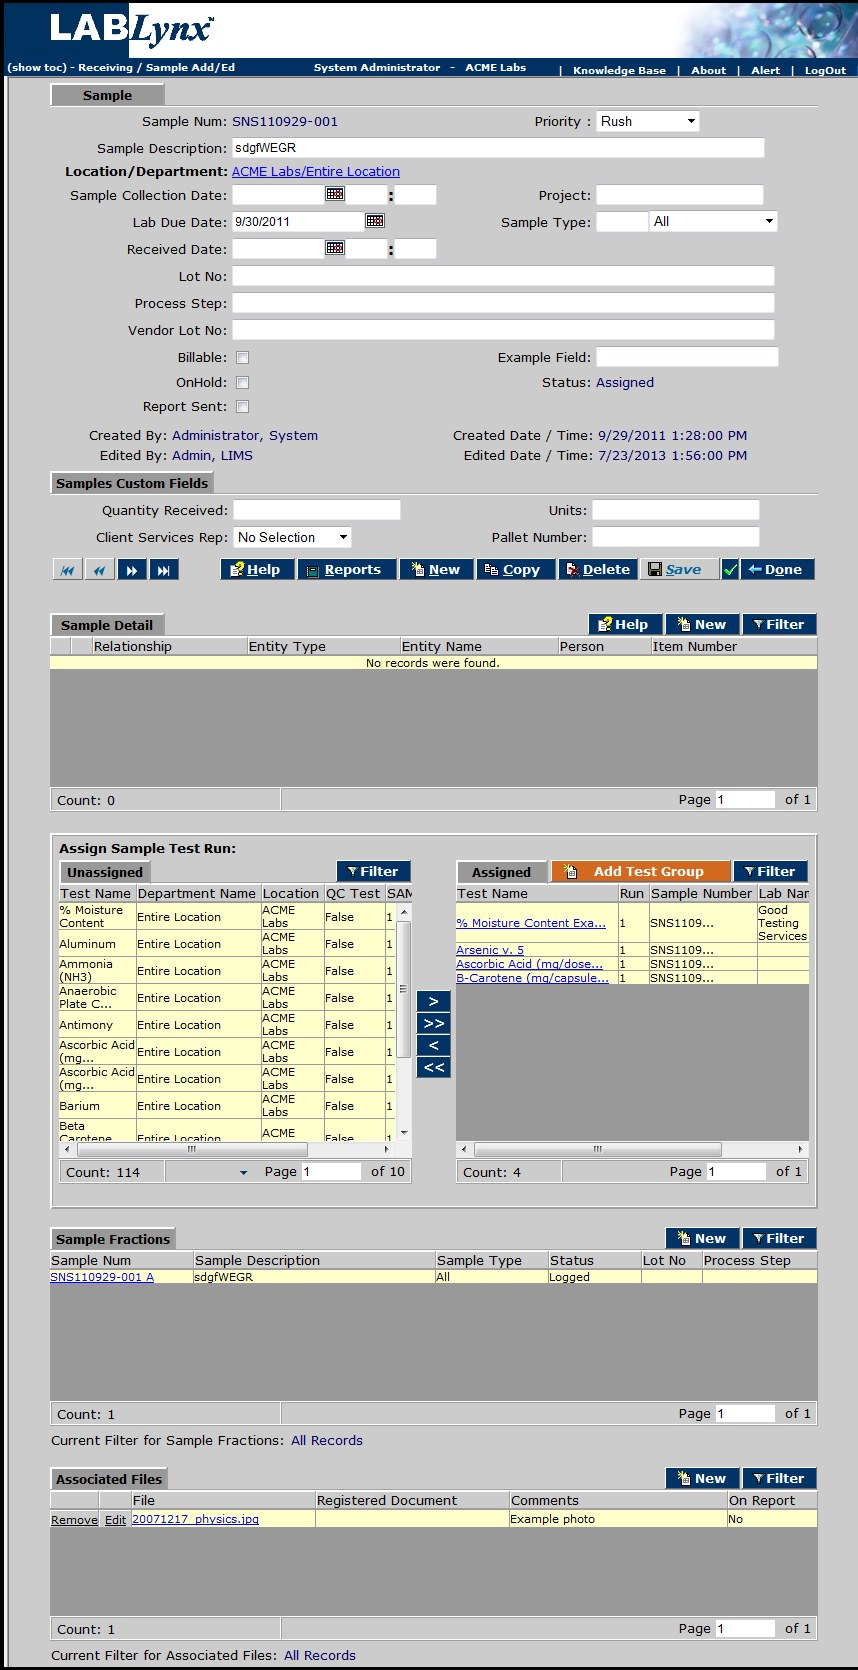
To view or edit an existing sample, you can filter for the criteria that will display it (i.e. a date range, received/not received, submitter, sample type, etc.). Once it is displayed, simply click the sample number, and ELab displays its Sample Detail screen.
You may add or edit any details for that sample here. When finished, click Save ![]() and then Done
and then Done ![]() .
.
To add a new sample, from the Samples List screen, click New ![]() .
.
'The New Sample Detail screen displays.' File:Sample Receiving List Screen - New Sample.jpg
[PICTURE New Sample.jpg]
You may enter all appropriate information for that sample. A unique sample number will be automatically generated upon saving. Required fields are in bold.
Field Description Priority Select a priority from the drop-down picklist. Description This is a free text field, you may enter a description of the sample. Location/Department This defaults to the user's logged-in location, but may be changed by clicking it. Sample Collection Date Click the calendar icon to select date, or type it in (01/02/03 or 01/02/2003 format), and enter a time (09:00 format). Material Type Select the type from the drop-down picklist. Type the first letter(s) of the type in the field to the left for faster selection. Collected By Select the sampler by clicking the Select link. Lab Due Date Click the calendar icon to enter any deadline for the sample. Program Type Select any type of program to be associated with the sample from the drop-down picklist. Sample Detail Fields Miscellaneous attributes or information regarding the sample may be listed in these text fields. The names of the fields may be edited to suit usage (see Label Definitions ) Billable Check this box if the sample is billable. OnHold Select this checkbox if the sample is to be put on hold for any reason. PO Number Enter any associated Purchase Order number. Received Date Date the sample was received. Click the calendar icon to populate the field.
Once the required (bold) fields are filled in, the sample may be saved at any time by clicking Save. At this point a unique Sample Number is generated by the system, and additional detail frames are displayed.
[PICTURE New Sample 2.jpg]
You may continue to edit. When done, click Save [PICTURE Save Button (S).jpg]. Clicking Done [PICTURE Done button (S).jpg] collapses the additional detail frames; clicking Done [PICTURE Done button (S).jpg] again returns you to the Samples List.
To Receive Samples
From the Sample Receiving Samples List screen, check the boxes to the left of any/all samples you wish to receive, and click Receive [PICTURE Receive Button.jpg].
[PICTURE Sample Receive 1.jpg]
The system popup asks if you would like to print labels for the selected sample(s).
[PICTURE Print Labels.jpg]
Select Yes to print. The labels are displayed in order as .pdf files. You may print as many labels as needed.
[PICTURE Label Print.jpg]
Whether you print labels or not, once samples have been received they are removed from the Sample Receiving list screen.
Related Topics


