LabLynx KB:LIMS user manual - 18.0 process grouping management
|
|
This is an article specific to the Category:LabLynx knowledge base. Its context outside of LabLynx, Inc may not be apparent, thus why it appears inside the LabLynx KB namespace. |
Introduction
LabLynx enables you to group one or more sample tests into a batch for data entry purposes. You can add and edit sample tests in a process group until the test results are approved for the respective process. You can also link quality control to a batch so that all results in the batch are related to their respective QC, and you can also link inventory items to the batch.
There are some key points to be made about process grouping:
- 1. A batch can only be created for a specific location/department and unique process combination.
- 2. The sample must have been received to begin the sample processing.
- 3. The process grouping function is greatly impacted by the test setup details. If you do not see what you expect to see, review how you set up the test, including:
- test users
- path assignment
- process definition for the assigned path
System Administrators use LabLynx ELab to manage process grouping information, including:
- process group details
- available samples
- assigned test runs
Adding or editing a process grouping
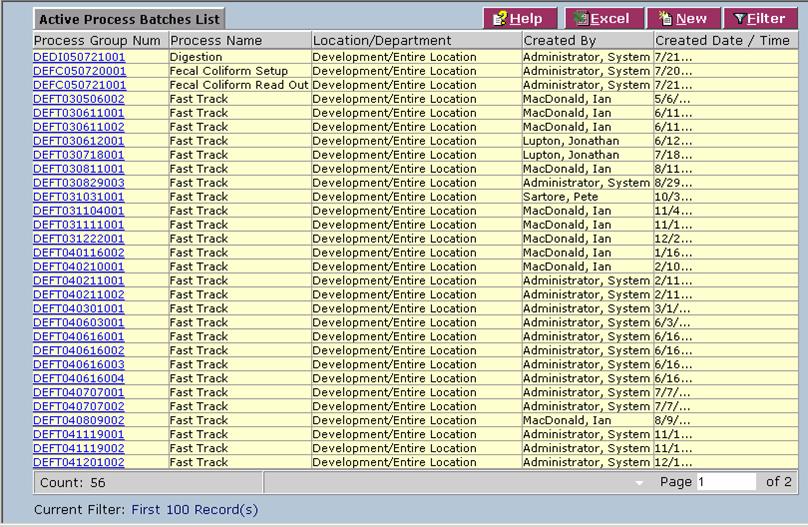
The Active Process Batches List screen displays LIMS active process batch information currently defined in the system:
1. From the Active Process Batches List, click New. (If you wish to edit an existing process batch, select one and skip to step four.) The system will display the Process Group Details screen:
2. Complete the fields of the Process Group Details screen. Fields in bold are required. The various fields are explained below:
| Field | Description |
|---|---|
| Department Name | Click the link to select a department name from the Lab Look Up (by Location & User) Lookup list. |
| Process Name | Click the link to select a process name from the Active Processes (filtered by User) Lookup list. |
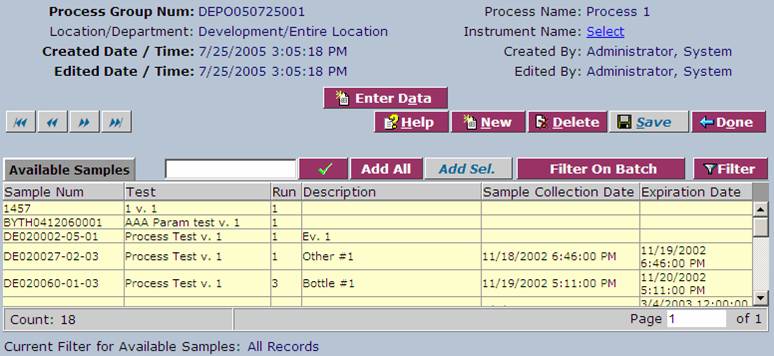
3. Click Continue. The system will then display an additional Instrument Name field and the Available Samples area:
4. Click the Instrument Name link to select an instrument from the Instruments Lookup list.
At this point, you can do several things.
Adding or editing a sample to/in a process group
1. From the Available Samples area on the Process Group Details screen, you can select a sample from the list and click the Add Sel. button, or you can click the Add All button to add all available samples:
(Note: The Available Samples list can be quite large. Use the Filter button to narrow the focus of the results.)
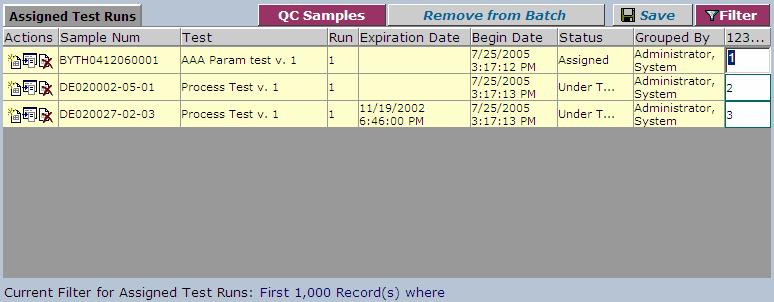
The selected samples are then added to the Assigned Test Runs area when you click one of the add buttons:
Re-ordering sample test runs
1. From the Assigned Test Runs area on the Process Group Details screen, click the 123… (Sequence) field for the test run you wish to re-order.
2. Type the number that corresponds to the place in which you would like the rest run to occur.
3. Click Save.
Removing a sample test run from a batch
1. From the Assigned Test Runs area on the Process Group Details screen, click a sample to select it.
2. Click Remove from Batch. The system removes the selected sample from the batch.
Adding a quality control sample
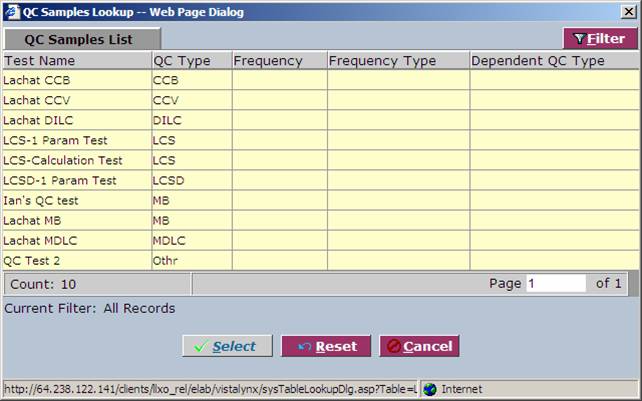
1. From the Assigned Test Runs area on the Process Group Details screen, click QC Samples. The system displays the QC Samples List:
2. Select a QC sample and click Select. The system will add the QC sample to the batch.
Adding a new run or QC test, or canceling a run
1. From the Assigned Test Runs area on the Process Group Details screen, click QC Samples. The system displays the QC Samples List.
2. From the Assigned Test Runs area, click an icon to perform one of the following actions:
3. Click Save.
4. When you are finished, click Save and then Done.
Exporting process batch information
To export an active process batch to Excel or a text file, click the Export button from the Active Process Batches List screen.


