LabLynx KB:SysAdmin - 4.0 security system setup
|
|
This is an article specific to the Category:LabLynx knowledge base. Its context outside of LabLynx, Inc may not be apparent, thus why it appears inside the LabLynx KB namespace. |
Security system setup
Managing security in installed LIMS software is a vital step, ensuring the integrity of the data collected, analyzed, and stored in your laboratory is maintained. This document aims to introduce the concepts of screen management and menu management. To get to the security area, select System, and then Security from the left-hand menu.
Screen management
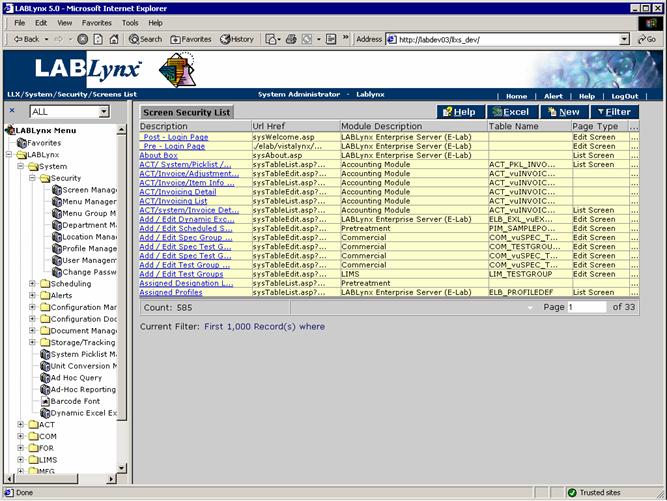
The screenshot below shows the first page in a long list of all defined screens or universal resource locators (URLs) on the LabLynx enterprise server. The default order of the Screen Security List is by screen description:
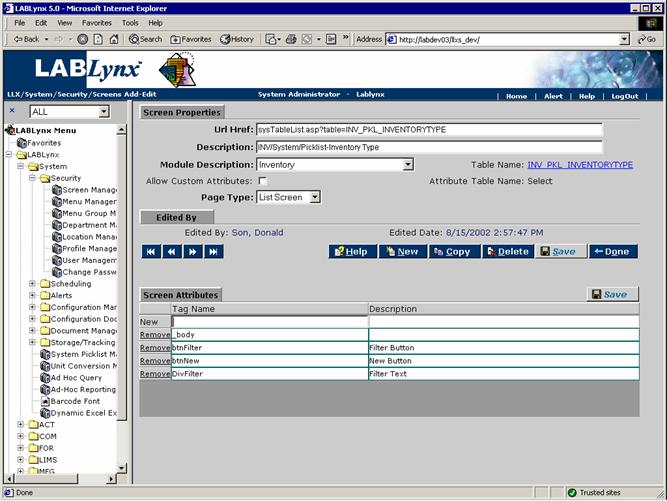
Users may then choose to edit the details of an already defined screen by selecting the description link, which will open up the Screen Properties screen and show those details. Alternatively the New button may be selected, which will open up a blank Screen Properties screen where new attributes may be defined:
The Screen Properties screen displays and allows editing of new or existing screens to be controlled by the system. A screen/URL is any file (typical examples are .asp, .htm, .doc, .pdf, etc.) that is managed through the security system of the system. The screens may be directly linked to the menu or, as more commonly occurs, by reference from other screens within the system. At the bottom of this screen exists a list of rights associated with the respective screen. This area will be blank when a new screen is being defined but will display once the new screen is saved. Rights are essentially the buttons and special functions that exist on the screens of the core system. As users add new screens to the system these rights will likely not exist unless the screens are configured by LabLynx, Inc.
Screens make up the core system menu (from which customer-specific menu groups may be generated). In addition to the menu, screens are used to create user profiles. These user profiles are merely groups of screens to which system users are assigned. The system user, once logged in to the system, will only see menu items based on the screens which they have been granted access (via user profiles). The system comes installed with a pre-defined list of screens necessary for its operation. The administrator (or system user with access to this area) may add additional screens or URLs to the system and the core menu structure, as well as manage these additional screens within the context of system user access.
Certain system users routinely use information from an external reference URL. For example, regular access to the Environmental Protection Agency Web site may be necessary. In order to access the EPA Web site the user has to open a new browser and type in the URL (http://www.epa.gov). Wishing to make access to this information easier for the system users, the system administrator creates a new screen in the system called "EPA Web site" with no rights being defined. The screen is then linked to the core system menu, and finally the screen is assigned to specific user profiles. Afterwards a system user has access to the EPA Web site directly through the system menu, and a new browser tab or window will not need to be opened.
It must be clear to the user that just because the screen is displayed to the user does not mean it has to be listed in the screens section of the system. It should only appear in this list if the screen is to be called directly by a menu selection, or more importantly, if the administrator wishes it to be controlled by system security.
Menu management
Once the screens have been defined, menu management will allow the user to apply these screens to the menu structure. The menu structure is not only composed of screens to select; there are cascading menu selections to get to selecting the screens. All menu management is handled through this area, whether new screens are being added to a menu or sub-menu, or screens are being moved to different menus. The menu information is stored in the LIMS database. When a user logs in, the database is accessed to determine the group (security profile) to which the user belongs. The profile information together with the menu structure is read from the database to build the menus for which the user is granted access (during the "Loading Menus ..." step). The menu structure and order is common for all LIMS users; however, the user will only see menu choices and screens that have been assigned to their current security profile.
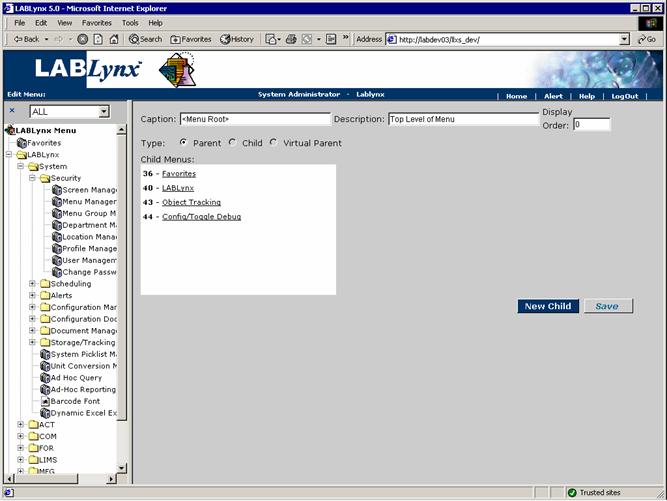
There are three kinds of items that can be in the menu structure: parents, children, and virtual parents. A parent (in the menu structure) is an item on the menu drop-down that has choices beneath it (children). With cascading menus, a parent may have children that in turn have children. The virtual parent is a screen (page) that can call (display) dialogue boxes (for example, the filter dialogue box available on many pages).
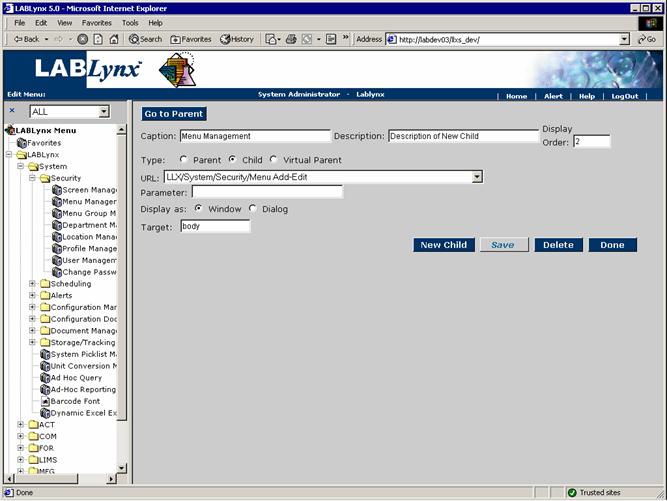
The area that displays the page title displays the complete path to the present location in the menu structure as the user navigates through it. Once the user has begun navigating down the menu tree (structure), a Go To Parent button appears at the top of the page to allow the user to move back up the tree. At each level, the children of the current menu selected are listed in the defined display order. Setting the display order determines where in the current level the child will appear. The caption is what will be displayed on the drop-down menu or as the name of the page. The user may also supply a brief description to distinguish the page from other pages of a similar name:
Clicking on the child name in the list will take the user to that level of the menu tree. If the item selected is a child and not a parent also, the middle portion of the page will change. If users wish to add a new parent as a child of the current level, they select the New Child button, and then select the Parent radio button near the top of the page. The user may define the caption to be displayed for the parent and then define children of the parent. If the item being defined is a child that is a screen and not another parent, the middle portion of the screen changes to allow the user to select the screen (previously defined) by name and the type of screen (full screen-window or dialogue box). The caption for a screen is for reference only; the actual title displayed when the page is accessed is based on the title defined in the page. To remove a child, the user must select the child by clicking it from the parent list (list containing the child).
When the child information is displayed, the user can select Delete to remove the child from the menu structure. (If the item being deleted is a screen, deleting does not remove the screen from the list of defined screens, but simply removes it from the menu.) When the user selects to define a child that is a screen, a list of the defined screen names (captions) is displayed for the user to select from. (A screen may be selected to appear under several different menus if required. For a screen, the Target is "body", meaning display the body of the page (the whole page). If the user selects a dialogue type screen instead of a window type screen, the user is prompted to fill in the width and height of the dialogue box to be displayed in pixels. (These numbers describe the screen size in pixels within the physical screen.)


