LabLynx KB:LIMS user manual - 10.0 test group management
|
|
This is an article specific to the Category:LabLynx knowledge base. Its context outside of LabLynx, Inc may not be apparent, thus why it appears inside the LabLynx KB namespace. |
Introduction
LabLynx enables you to add and edit test groups. Test groups are multiple tests grouped together into a single entity. Each test group is a list of user-defined tests for the same lab location. Test groups provide a quick and efficient way to assign tests during scheduling and sample creation.
System Administrators use LabLynx ELab to manage test group information, including:
- test group details
- group test assignments
- associated files
- batch uploads
Creating a test group
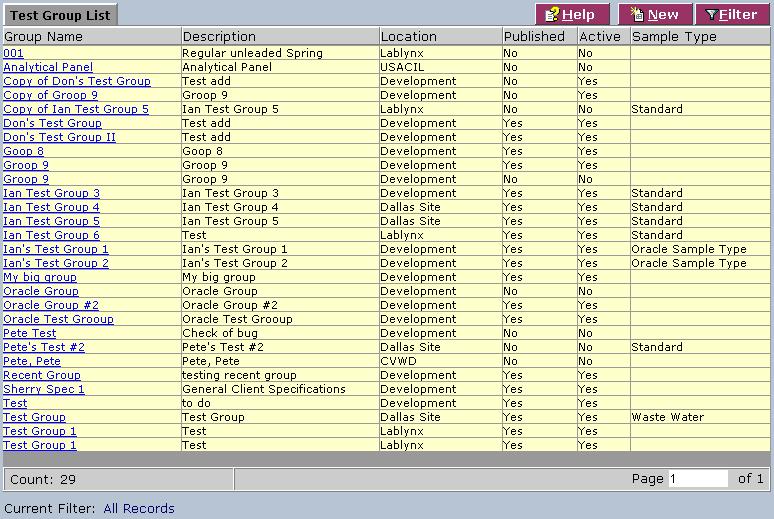
The Test Group List screen displays test groups information currently defined in the system:
1. From the Test Group List, select a group name or click New. The system displays the Test Group Details screen:
2. Complete the fields of the Test Group Details screen. Fields in bold are required. The various fields are explained below:
| Field | Description |
|---|---|
| Group Name | Type the name of test group. |
| Description | Type a description. |
| Location | Select a lab Location from the drop-down list. |
| Sample Type | Select the type from the drop-down list. Type the first letter(s) of the type in the field to the left for faster selection from the drop-down list. |
| Standard Price | Type the pricing information for invoicing purposes. |
| Published | Select the check box to publish the test group. |
| Active | Select the check box to activate the test group. |
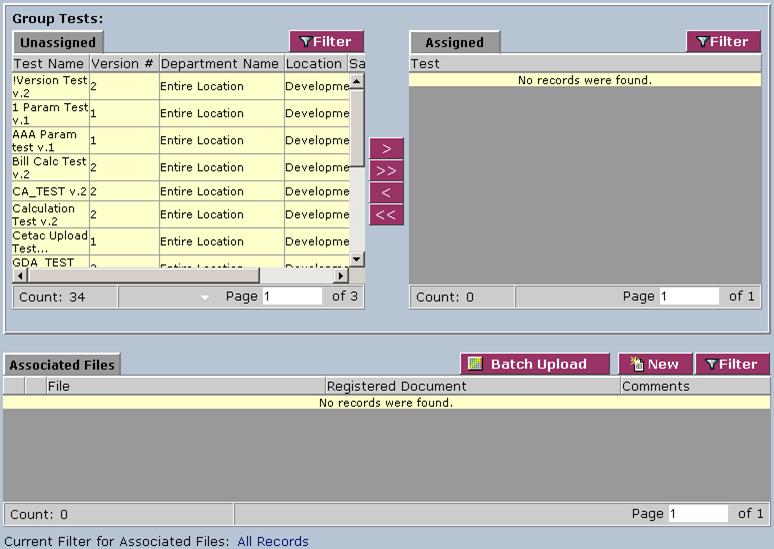
3. When you are finished, click Save. The system displays both the Group Tests (top) and Associated Files (bottom) areas:
Assigning a group test
1. From the Group Tests area, select one or more tests from the Unassigned area.
2. Click the > button to assign the selected test(s) or the >> button to assign tests. The system assigns the test(s) to the test group in the Assigned area.
3. To remove a test from a group, use the < button for one test or the << button for all tests.
Uploading an associated file
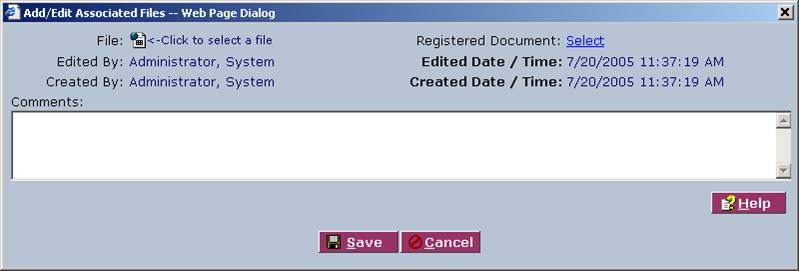
1. From the Associated Files area, click New. The system displays the Add/Edit Associated Files screen:
2. Complete the fields of the Add/Edit Associated Files screen. The various fields are explained below:
| Field | Description |
|---|---|
| File | Click to select a file through the Send File to Server dialog. |
| Registered Document | Click the link to select a file through the Documents List. |
| Comments | Type comments about the file. |
3. When you are finished, click Save. The system will return to the Associated Files area.
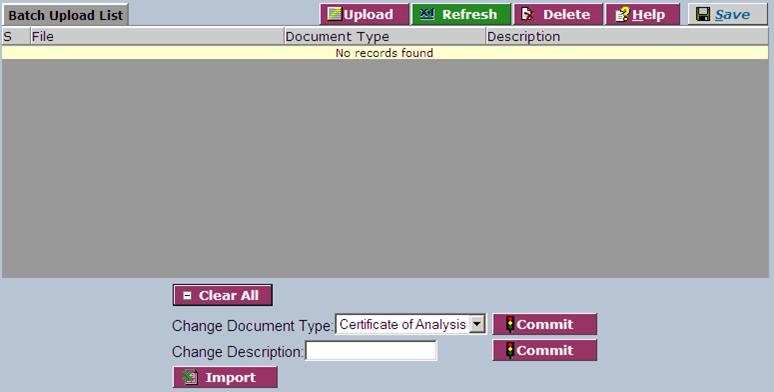
4. From the Associated Files area, click the Batch Upload button. The system displays the Batch Upload List screen:
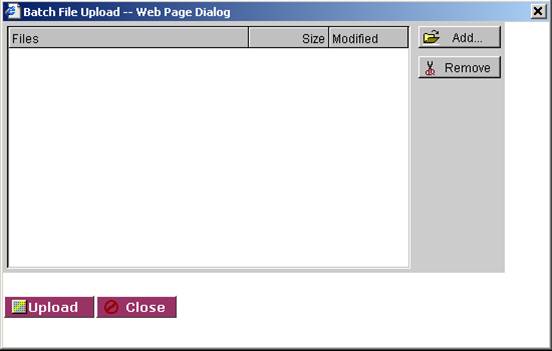
5. From the Batch Upload List screen, click Upload. The system displays the Batch File Upload window:
6. Click Add to select files through the Add Files to Transfer window.
7. When you have selected the file, click OK. The system will return to the Batch File Upload window.
8. Click Upload. The system will upload the file from your computer and display it in the Batch Upload List.
9. Click Select All to select all files, or click an individual file to select it.
10. Complete the remaining fields of the Batch Upload List screen, described below:
| Field | Description |
|---|---|
| Change Document Type | Select the document type from the drop-down list and click Commit. |
| Change Description | Type a description and click Commit. |
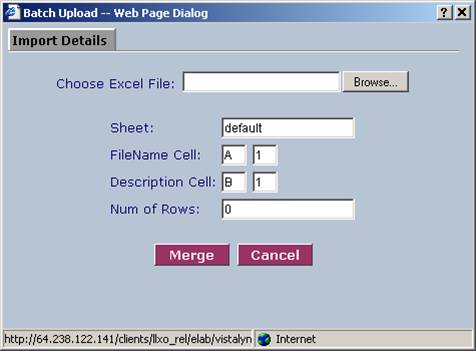
11. To import an Excel file, click Import. The system displays the Batch Upload screen with an Import Details dialog:
12. Complete the fields of the Batch Upload Web page dialog. The various fields are explained below:
| Field | Description |
|---|---|
| Choose Excel File | Click Browse... to select a file. |
| Sheet | Type the name of the sheet. |
| FileName Cell | Enter the filename cell details. |
| Description Cell | Enter the description cell details. |
| Num of Rows | Type the number of rows. |
13. When you are finished, click Merge. The system will return to the Batch Upload List.
14. When you are finished uploading files, click Save and then Done.
Saving a test group
When you have finished assigning group tests and uploading files, from the Test Group Details screen, click Save and then Done. The system will return to the Test Group List screen.
