LabLynx KB:LIMS user manual - 3.0 path management
|
|
This is an article specific to the Category:LabLynx knowledge base. Its context outside of LabLynx, Inc may not be apparent, thus why it appears inside the LabLynx KB namespace. |
Introduction
LabLynx enables you to add and edit path information. Paths group processes together and place them in sequential order. Each path defines the workflows that exist in the laboratory. Once you add paths, you can assign them to the tests that you have defined in the system.
System Administrators use LabLynx ELab to manage several aspects of path information:
- path definition
- path processes
Adding or editing paths
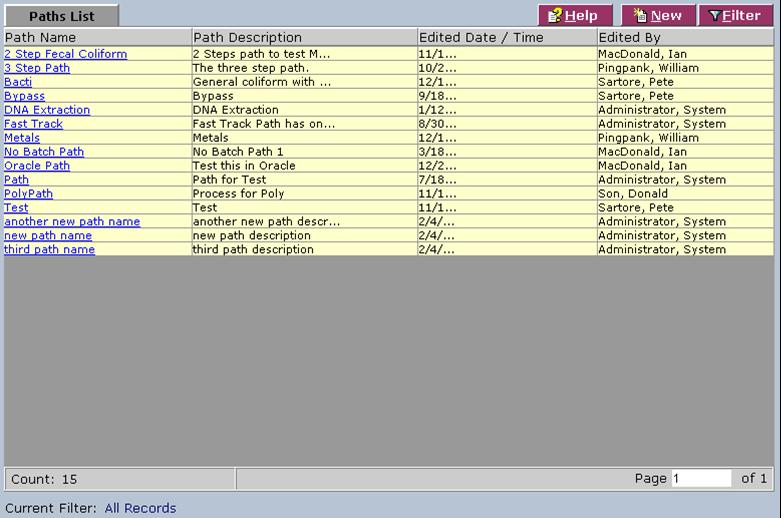
The Paths List screen displays path information currently defined in the system:
1. From the Paths List, select a path or click New. The system displays the Path Definition screen:
2. Complete the fields of the Path Definition screen. Fields in bold are required. The various fields are explained below:
| Field | Description |
|---|---|
| Path Name | Type the name of the path. |
| Path Description | Type a description of the path. |
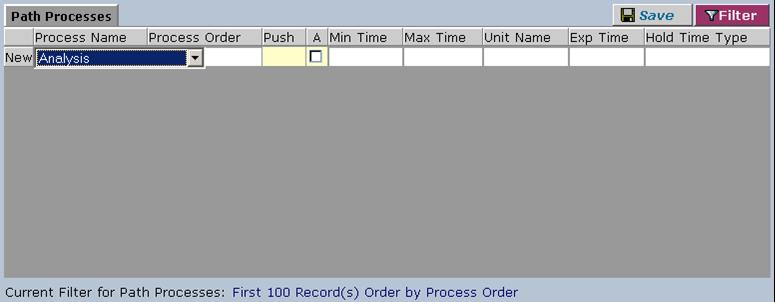
3. When you are finished, click Save. The system displays the Path Processes area:
4. Complete the fields of the Path Processes area. The various fields are explained below:
| Field | Description |
|---|---|
| Process Name | Select a process from the drop-down list. |
| Process Order | Type the order in which the processes are to be completed. |
| Push A (Alt User) |
Select the check box to alert the system that the user who entered the data for the process cannot approve the data. Another user must "push" or review the results and move them to their next respective process. |
| Min Time | Type the minimum amount of time the process should take. |
| Max Time | Type the maximum amount of time the process should take. |
| Unit Name | Select the unit name for the process from the drop-down list. |
| Exp Time | Type the amount of time before the sample will not be able to be used in this process (hold time). |
| Hold Time Type | Select the hold time type from the drop-down list. |


