LabLynx KB:LIMS user manual - 7.0 QC template management
|
|
This is an article specific to the Category:LabLynx knowledge base. Its context outside of LabLynx, Inc may not be apparent, thus why it appears inside the LabLynx KB namespace. |
Introduction
LabLynx enables you to add and edit quality control (QC) template information. Quality control templates are templates for building QC tests; they define the basic formula for QC parameters.
System Administrators use LabLynx ELab to manage QC template information, including:
- QC template details
- QC template parameter details
- QC template quality control
- QC template formula
Adding or editing QC template information
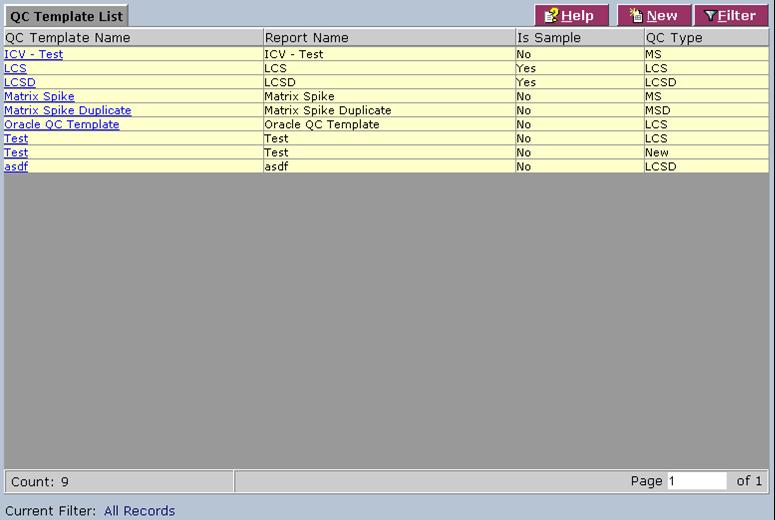
The QC Template List screen displays QC template information currently defined in the system:
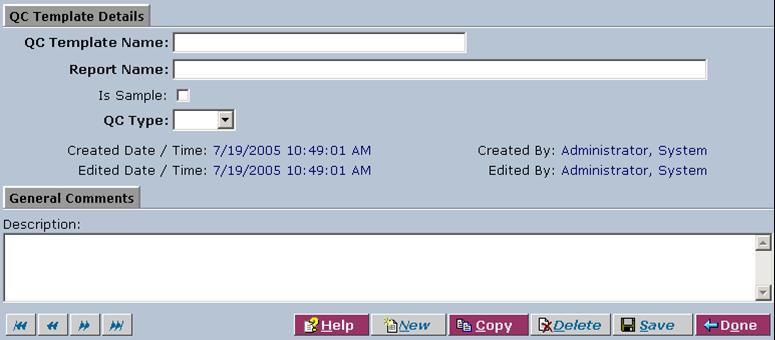
1. From the QC Template List, select a QC template Name or click New. The system displays the QC Template Details screen:
2. Complete the fields of the QC Template Details screen. Fields in bold are required. The various fields are explained below:
| Field | Description |
|---|---|
| QC Template Name | Type the name for the QC template. |
| Report Name | Type the name for reporting purposes. |
| IS Sample | Select the check box to indicate that when a QC test derived from this template is used in a batch, the system must create an entirely new sample for which to assign the QC test. |
| QC Type | Select the QC type from the drop-down list. This field indicates the main grouping information for the QC template for control charting. |
3. When you are finished, click Save.
Adding or editing QC test parameters
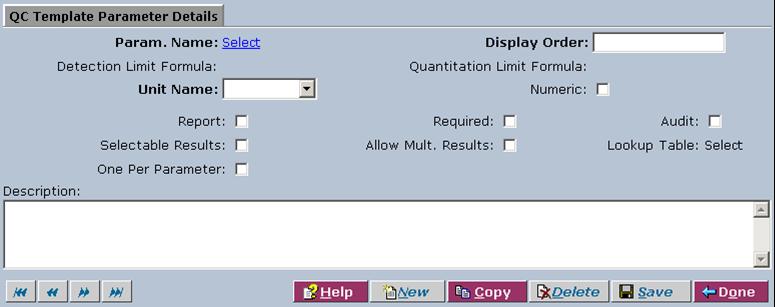
4. The system next displays the QC Template Parameters screen. From here, select a parameter name or click New. The QC Template Parameter Details screen appears:
5. Complete the fields of the QC Template Parameter Details screen. Fields in bold are required. The various fields are explained below:
| Field | Description |
|---|---|
| Param. Name | Click the link to select a parameter from the Active Master Parameters List. |
| Display Order | Type the order in which the parameter is to be displayed to users on results entry screens and reports. (Note: This value will likely be overwritten at the test level, so it is not necessary to define it now.) |
| Detection Limit Formula | Enter the detection limit default value. (Note: This value will likely be overwritten at the test level, so it is not necessary to define it now.) |
| Quantitation Limit Formula | Enter the quantitation limit default value. (Note: This value will likely be overwritten at the test level, so it is not necessary to define it now.) |
| Unit Name | Select the unit from the drop-down list. |
| Number | Select the check box to indicate that the results are to be numeric. |
| Report | Select the check box to indicate that the results are not to be reported. |
| Required | Select the check box to indicate that the results must be entered. |
| Audit | Select the check box to indicate that the results will be audit-tracked during routine sample processing. |
| Selectable Results | Select the check box to indicate that the results may have selectable results assigned. This check box activates the Lookup Table field. |
| Allow Mult. Results | Select the check box to indicate that the results may have multiple selected results. |
| Lookup Table | Click the link to select the link table from the Link Tables List. |
| One Per Parameter | Select the check box to alert the system to programmatically create new parameters. |
| Description | Type a description. |
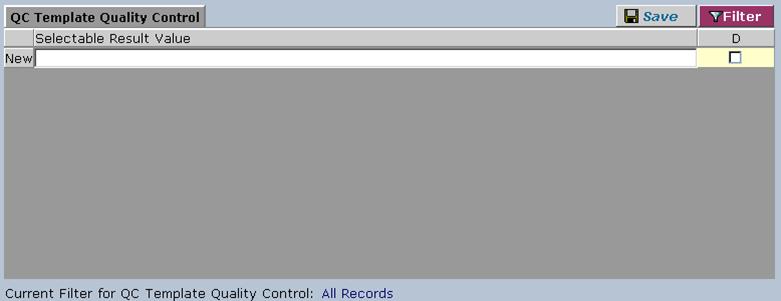
6. When you are finished, click Save. The system next displays the QC Template Quality Control screen:
7. Complete the fields of the QC Template Quality Control area. The various fields are explained below:
| Field | Description |
|---|---|
| Selectable Result Value | Type the value of the selectable result. |
| D (Default) | Select the check box to indicate if this is a default value. |
8. Click Save.
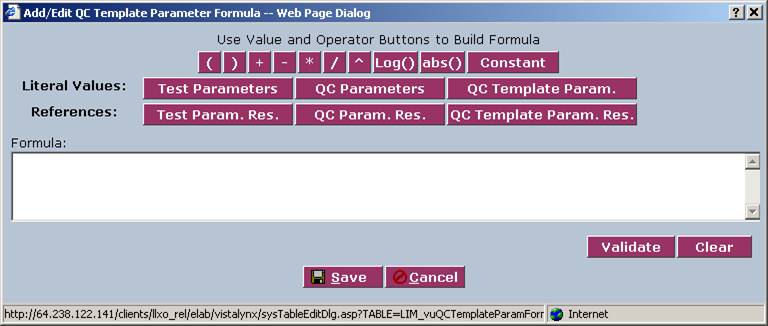
9. Click the Formula button to assign a formula. The system displays the calculation editor in the Add/Edit QC Template Parameter Formula window:
10. Use the value and operator buttons in the first row to build the formula. The various buttons are explained below:
| Button | Description |
|---|---|
| (, ), +, -, *, /, ^, Log(), abs() | Click any of these buttons to add the operator to the Formula field. |
| Constant | Click to add a value to the formula through the Constant field that appears in a pop-up window. |
11. Click any of the literal values buttons to assign parameters to the Formula field. These literal values buttons are explained below:
| Button | Description |
|---|---|
| Test Parameters | Click to select a parameter from the Active Test Parameters List. |
| QC Parameters | Click to select a parameter from the Active QC Parameters List. |
| QC Template Param. | Click to select a parameter from the QC Template Parameters List. |
12. Click any of the references buttons to assign parameters to the Formula field. These references buttons are explained below:
| Button | Description |
|---|---|
| Test Parameters Res. | Click to add a test parameter result to the formula. |
| QC Param. Res. | Click to select a parameter result from the QC Types List. |
| QC Template Param. Res. | Click to select a parameter from the QC Template Duplicating Parameters List. |
13. Click Validate to validate the formula, or Clear to start over.
14. If the formula is valid, click Save. The system returns to the QC Template Parameter Details screen.
15. Click Save and then Done. The system returns to the QC Template Details screen.
16. From this screen, you can add additional QC template parameters. Otherwise, click Save and then Done.
