LabLynx KB:Receiving - 2.0 item management
|
|
This is an article specific to the Category:LabLynx knowledge base. Its context outside of LabLynx, Inc may not be apparent, thus why it appears inside the LabLynx KB namespace. |
Item management
An item can be anything that users wish to associate to a sample or track for an entity or both. When logging in a sample, the user may define the item that is being sampled. The system is then capable of tracking all of the results for an item over a given period of time. The purpose of an item is to allow users to track all samples and their results associated with the item. Items may also be associated with entities (entity items). An item may also be associated with many entities. Authorized users will be allowed to assign one ore more tests to an item. When that item is associated with a sample, the tests will automatically be assigned to the sample.
As stated previously, an item can be anything that you wish to associate to a sample or track for an entity or both. They can be generic as "widget" or specific as "ABC Company .4 Micron Widget." Examples of items are materials, products, formulas, sample points, animals, etc.
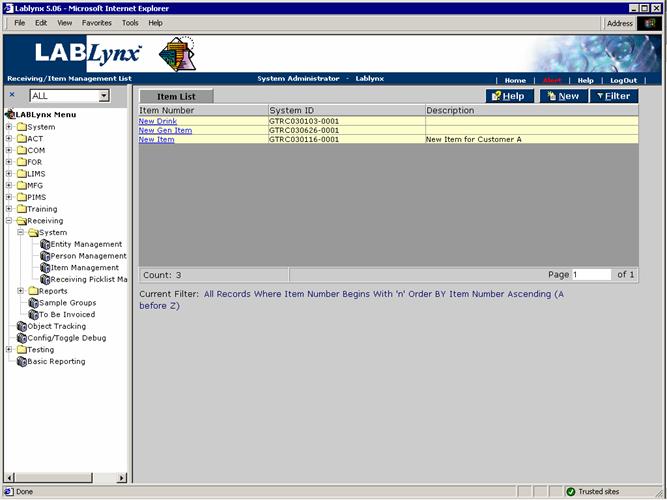
From the Item List the user is shown a list of currently defined items in the system. To the far right on the screen exists …, indicating that additional information exists for the values. The information displayed to the user includes item Name, system ID, and description:
The user may edit an existing record simply by clicking the selected record, redirecting the user to the Item Detail screen. The user may also create a new record in this list by selecting the New button, which will also redirect to the Item Detail screen.
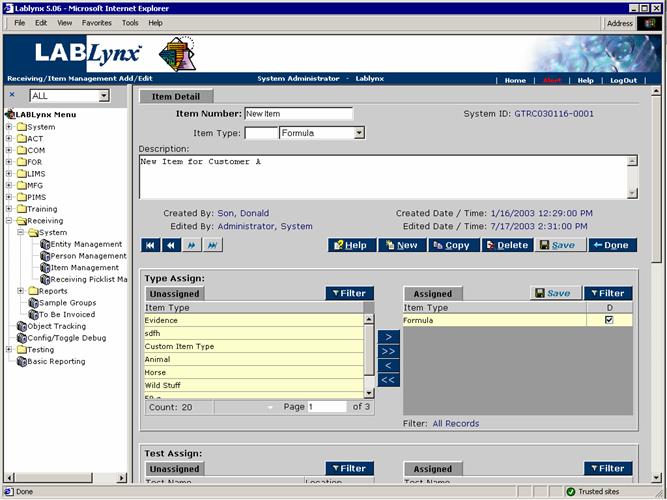
The user will see the specific details associated with a selected item in the system or a series of data input values that are required for entry for a new item record. The item detail captures the general information for the item. The user will enter the item name and choose the item type from the Item Type picklist. The user may also enter any additional descriptions about the item they wish in the Description field:
The Item Detail screen has many additional areas that can be seen by scrolling down. Those areas will be explained further now.
Type Assign area
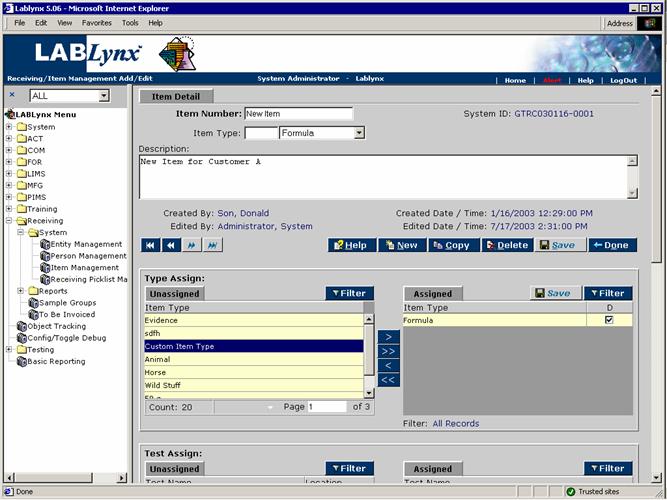
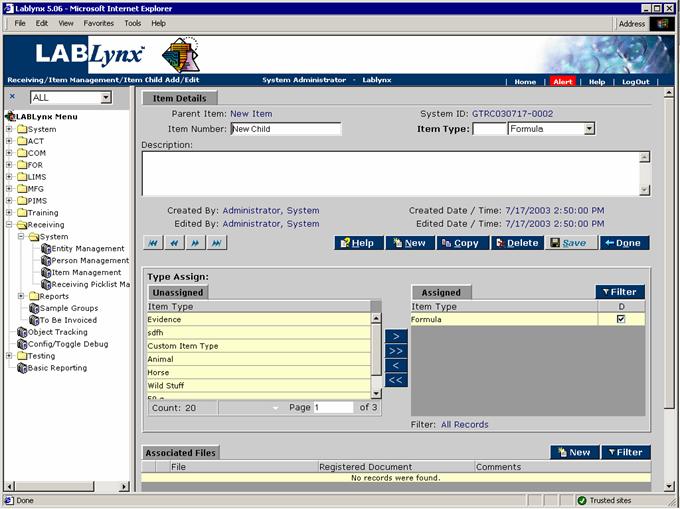
Item types are assigned to the items for their classification. This assigned/unassigned frame allows the user to assign one or more item types to an item. The item types are stored in the Item Types picklist under the Manufacturing Picklists menu. The user will then be allowed to define which of the assigned item types should be used as the default type by the system. Should it be necessary to add or remove a test, the user would click on the appropriate test(s) and click on the > button to add them and the < button to remove them:
Test Assign area
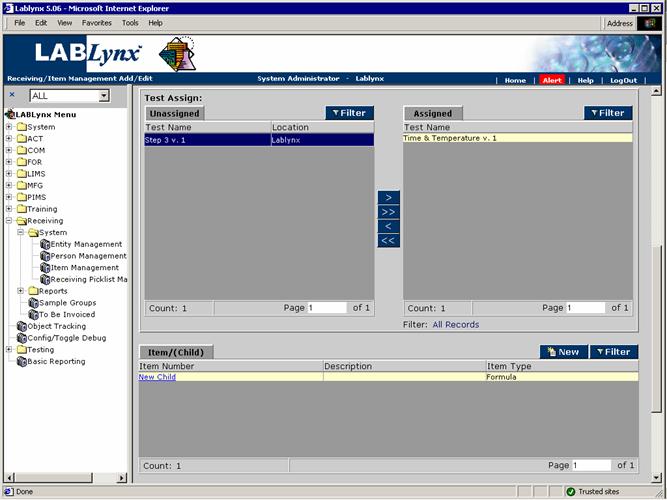
Authorized users will be allowed to assign tests to the item using the assigned/unassigned frame. The tests that are assigned to an item here will be assigned to any samples that the item is associated with at login. Should it be necessary to add or remove a test, the user would click on the appropriate test(s) and click on the > button to add them and the < button to remove them:
Item/(Child) area
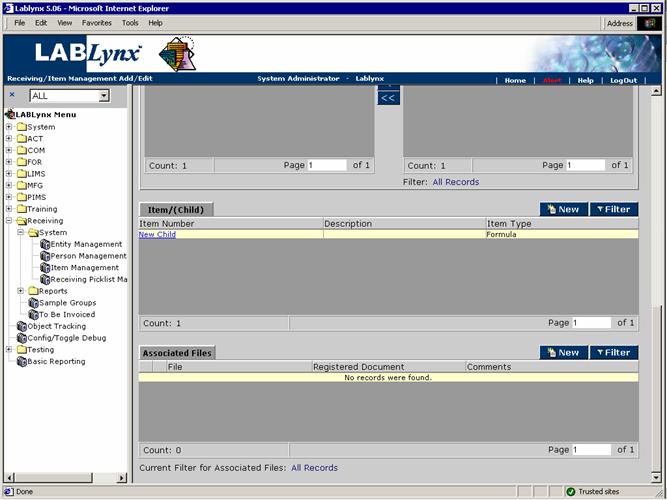
An item may have one or more child items. Child items can be components or pieces of the item. In the case where an item is a grouping, the parts of the group are the item children.
The item/child frame displays the children associated with the item. The information shown to the user includes the item name, system ID, and description:
The user may edit an existing record simply by clicking the selected record, redirecting the user to the Item Child Add/Edit screen. The user may also create a new record in this list by selecting the New button, which will also redirect to the Item Child Add/Edit screen:
Associated Files area
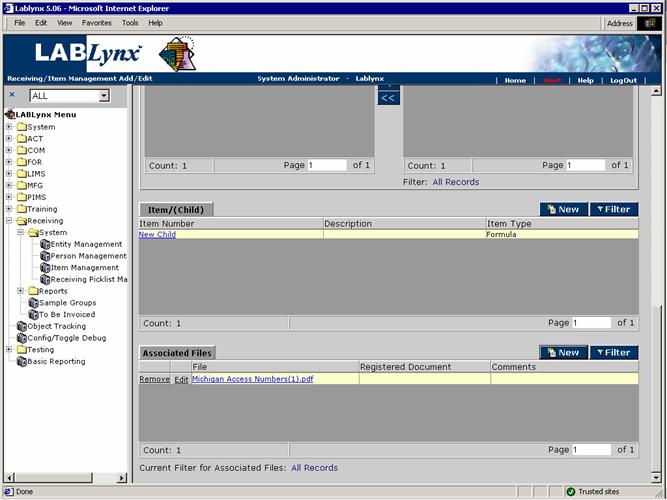
Users can see files that are related to the sample group, and authorized users will be allowed to associate files with an item. This allows users to have access to files from the system. Examples of these files include photos, documents, formulas, etc.:
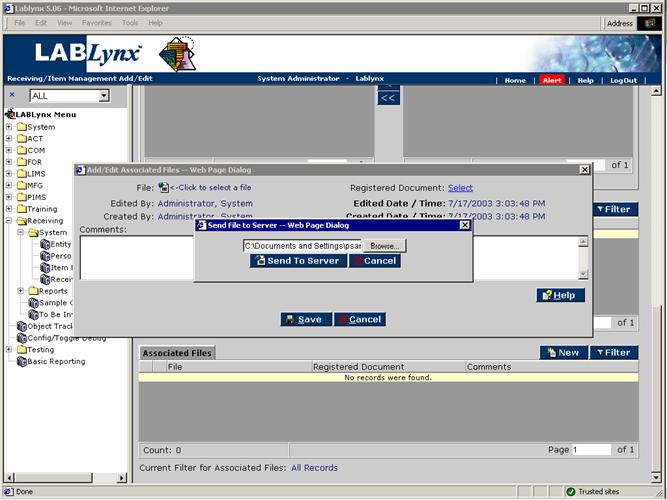
The user may edit an existing record simply by clicking the selected record, redirecting the user to the Add/Edit Associated Files screen. The user may also create a new record in this list by selecting the New button, which will also redirect to the Add/Edit Associated Files screen:
