LabLynx KB:Client management
|
|
This is an article specific to the Category:LabLynx knowledge base. Its context outside of LabLynx, Inc may not be apparent, thus why it appears inside the LabLynx KB namespace. |
Introduction
LabLynx enables you to add and edit client information, including parent company details.
System administrators use LabLynx ELab to manage client information, including:
- client details
- general parent company information
- parent company contact information
Adding or editing a client
The Clients List screen displays client information currently defined in the system:
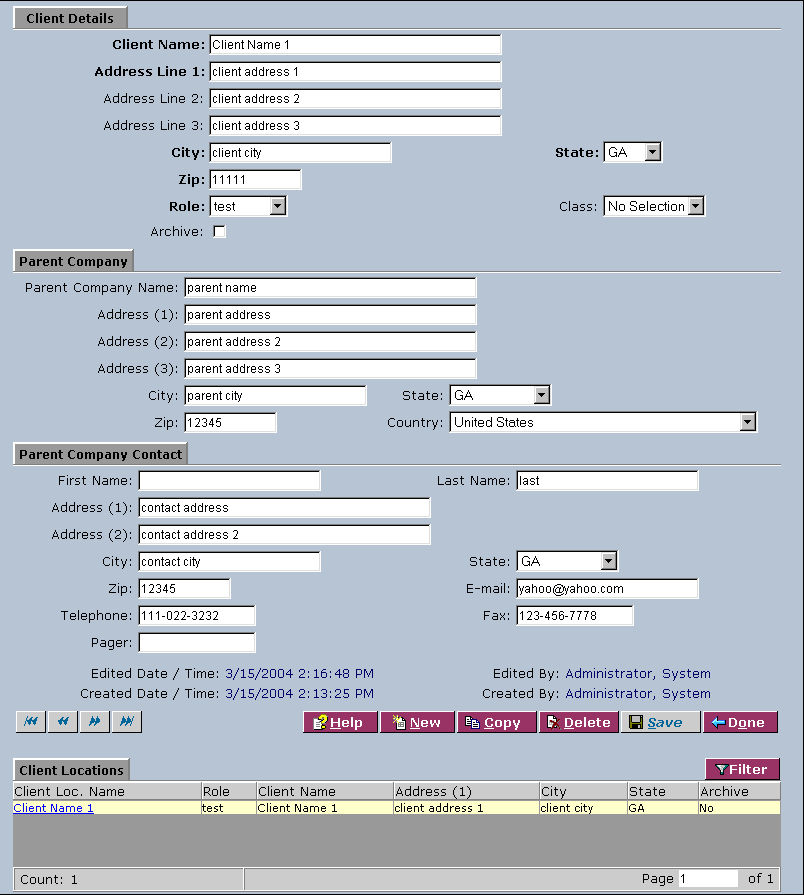
1. From the Clients List, select a client name or click New. The system will display the Client Details screen:
2. Complete the fields of the Client Details area. Fields in bold are required. The various fields are explained below:
| Field | Description |
|---|---|
| Client Name | Type the name of the client. |
| Address Line 1 | Type the first line of the address. |
| Address Line 2 | Type the second line of the address. |
| Address Line 3 | Type the third line of the address. |
| City | Type the city name. |
| State | Select the state from the drop-down list. |
| Zip | Type the zip code. |
| Role | Select the role from the drop-down list. |
| Class | Select the class from the drop-down list. |
| Archive | Select the check box to archive the entry. |
3. Also complete the fields of the Parent Company area. The various fields are explained below:
| Field | Description |
|---|---|
| Parent Company Name | Type the name of the parent company. |
| Address (1) | Type the first line of the address. |
| Address (2) | Type the second line of the address. |
| Address (3) | Type the third line of the address. |
| City | Type the city name. |
| State | Select the state from the drop-down list. |
| Zip | Type the zip code. |
| Country | Select the country from the drop-down list. |
4. Finally, complete the fields of the Parent Company Contact area. The various fields are explained below:
| Field | Description |
|---|---|
| First Name | Type the given name of the primary contact. |
| Last Name | Type the surname of the primary contact. |
| Address (1) | Type the first line of the address. |
| Address (2) | Type the second line of the address. |
| Address (3) | Type the third line of the address. |
| City | Type the city name. |
| State | Select the state from the drop-down list. |
| Zip | Type the zip code. |
| Type the e-mail address. | |
| Telephone | Type the telephone number. |
| Fax | Type the fax number. |
| Pager | Type the pager number. |
5. When you are finished, click Save and then Done.
Note: To edit information in the Client Locations area, click the client location that you want to edit, and then refer to the client location management page.


