LabLynx KB:Data entry - 3.0 process batch management
|
|
This is an article specific to the Category:LabLynx knowledge base. Its context outside of LabLynx, Inc may not be apparent, thus why it appears inside the LabLynx KB namespace. |
Introduction
As stated in a previous article, a process group or batch is a single entity under which one or many sample tests may be grouped for data entry purposes. A process group may have sample tests added to/deleted from it up until results entry has been completed and approved for the respective process. Once the approval has occurred, the batch number will no longer be displayed, and further editing may only take place in future process groups containing the sample test results of interest.
Data entry
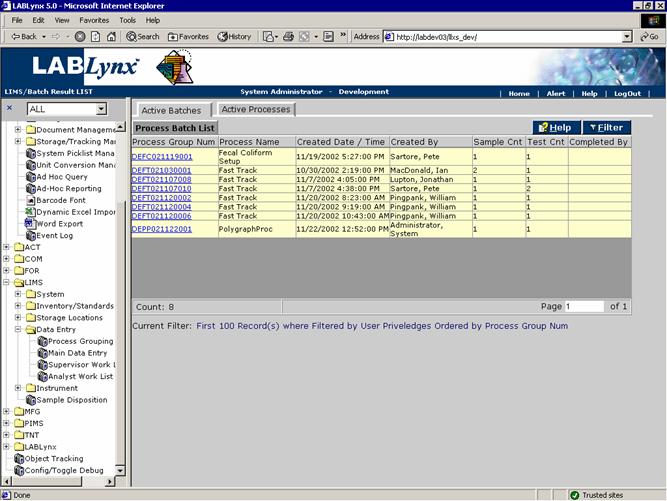
The purpose of the process group batch list is to allow a user to quickly view process batches that may require their attention for results entry or results review purposes:
As an analyst, the user would view this screen to see what batches they (or others) have created, not begun, or not completed. The user may then simply select a process batch and continue for results entry. As a supervisor, the user may access this screen to view batches of sample tests that require approval/review.
Special Notes:
- 1.The system will display all process groups that the logged in user has access to, not just the ones created by that individual.
- 2. A process group/batch will remain on this list until the last sample/test/result has been completed or canceled.
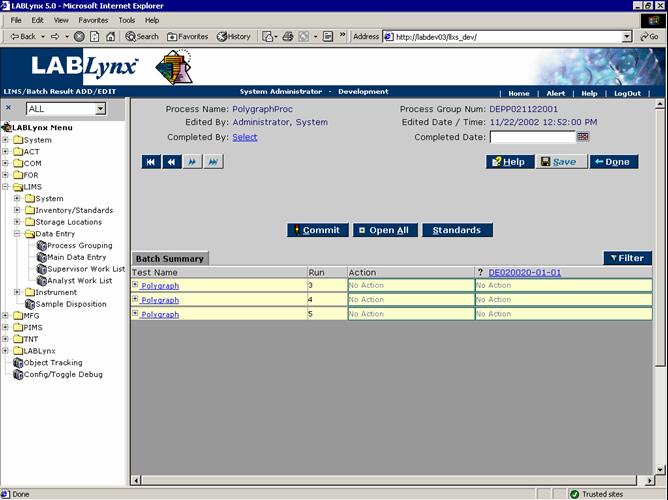
The process group review screen allows a user to view the contents of an already generated batch. The screen is broken down into three sections. The first section is the general information about the batch: the batch number and batch completion information. The second section is the central area of the screen that displays the actual sample/test contents of the batch:
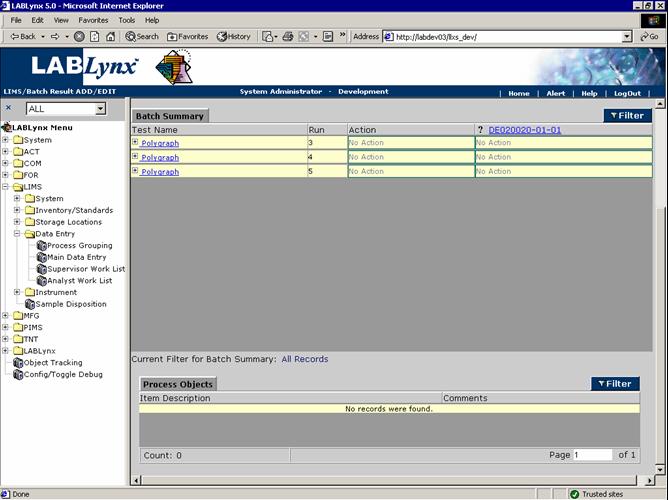
The third and final section of the screen displays the assigned process objects to all sample tests associated with the batch. (Please note that the process objects may be inventory items, instruments, or any other object tracked by the system tracking function):
The user may enter the batch data entry screen using one of two options. The first entrance method is through the batch review screen. From this screen, the user may have selected a specific test name from the review list. In doing so, the system displays this screen filtered for all sample test runs for the selected test in the respective batch.
The second entry method to this screen is available to the user from the Entry by Sample screen. In this case, the user selects a hyperlinked sample number from the batch review screen, getting redirected to the sample details screen, and finally, selecting a test run to enter data for.
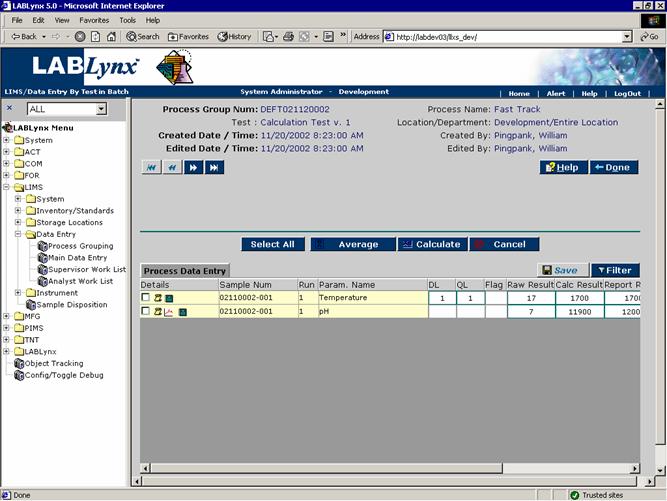
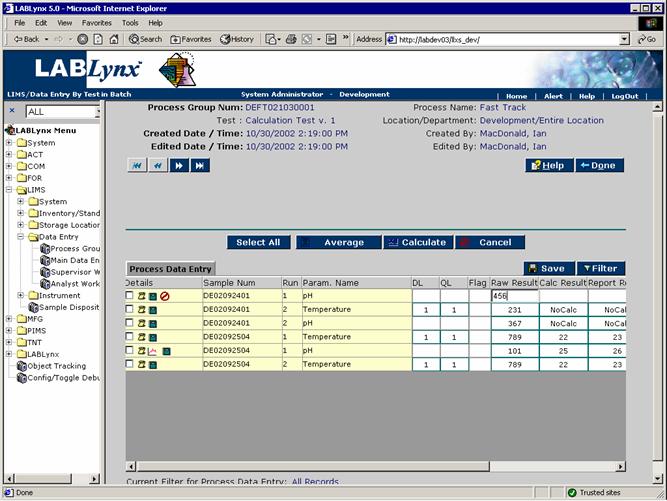
The main data entry screen is the sole area for entering in, validating, and correcting test parameter results in the system. This screen will likely be the most routinely used one in the system:
From the Process Data Entry area the user will see a list of sample test run parameter results. The list displays only those parameters that have been defined for that process. It is possible that additional analytes exist for the test; however, they do not necessarily have to be displayed.
This area consists of the following:
- 1. a check box and details associated with that sample test run parameter result: the check box is used for telling the system which results to calculate, average, or cancel. The additional information displayed to the right of the checkbox may contain limit violation, additional note, report/no-report, cancellation, modified DL/QL value, and average icons.
- 2. the system -enerated sample number
- 3. the run number
- 4. the name of the parameter
- 5. the DL (detection limit): this value is derived from the test parameter definition. There may also be an additional calculation defined at the set-up level. If this is true, the corrected DL will only be calculated when the user places a check in the check box (or the user selects the Select All button) and then clicks on the Calculate button. Once this is done, the system will recalculate the DL value and display the corrected value.
- 6. the QL (quantitation value): this value is derived from the test parameter definition. There may also be an additional calculation defined at the set-up level. If this is true, the corrected QL will only be calculated when the user places a check in the chec kbox (or the user selects the Select All button) and then clicks on the Calculate button. Once this is done, the system will recalculate the QL value and display the corrected value.
- 7. the flag code: this value may be system-generated as well as user-modified. In the case of system generation, the system looks to the test set-up information for the parameter and checks to see if flag information has been entered for the cases where:
- the calculated result for the test run is less than the DL. (If this were true, the system would insert whatever text was defined for the test parameter flag field.)
- the calculated result is greater than the DL but less than the QL. (In this case the system would insert the flag from the respective test parameter definition.)
- 8. the raw result, calculated result, and reported result: these fields are important. The raw result field is where the user may enter any value and where the system will check to see if a calculation exists for it. If a calculation does exist the system will execute the calculation and insert the calculated result into the Calc Result column. The system will then perform any rounding and significant figure manipulation to the calc result, and that value will be inserted into the Report Result column.
When entering in raw data, the system will check to see if the result is text or numeric. If the result is text, the system simply copies the data to the Calc Result and Report Result fields. Should the result be numeric, the system will see if a calculation exists for it and execute the calculation, write the calculated value into the Calc Result field, round the calculated result and write it into the Report Result field. The system calculator looks for the calculated result for any variables being used in the calculation definition. The only exception to this is for the actual parameter result where it uses the result for itself in the calculation. In this case, the system will use the raw value for this parameter in the calculation. Should a result value not exist for the sought parameter result, the system will place a "No Calc" text value in the Calc Result and Report Result fields:
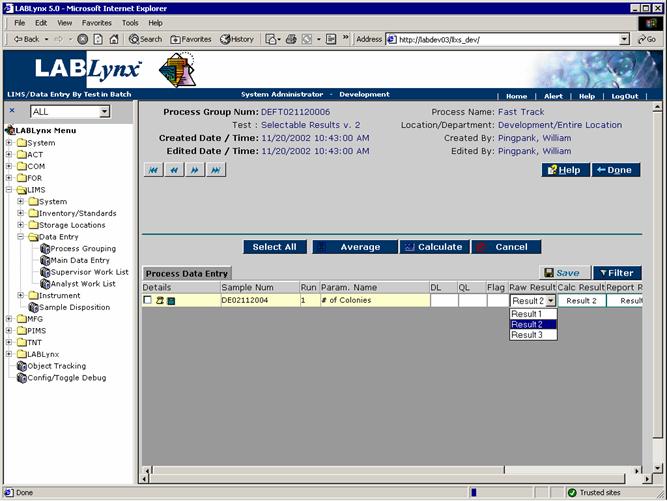
Some test Parameters may have the option of being selectable results. In these cases the user — when clicking on the raw value entry box — will be presented with a picklist of selections from which to choose. Once selected one of two things may occur depending on the test set-up information. In the first case, the test set-up will have the parameter defined as selectable results not allowing multiple results. In this case, the system will only allow a user to select a single value from the picklist. It will not be possible to edit the contents. Rather, the user can merely change the value to another picklist selectable value. In the second case, the test set-up will have the parameter defined as a selectable result allowing multiple results. When a user enters data for a test of this type, the system will display the picklist of values, and the user may double click each value they wish to add. The system will then add the selected result to the list of previously selected ones, and the user may edit the actual content of their list:
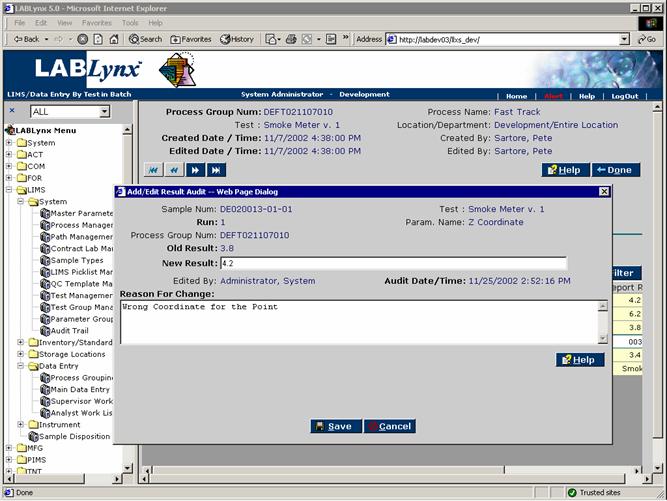
In most cases each test parameter is defined as being auditable or not. If the parameter was not flagged as such, changes may be made to the data at any time, and those changes will not be tracked. If, however, the parameter is flagged as being auditable, once the initial result is entered, the user (regardless of which user it is) must provide a reason for the change:
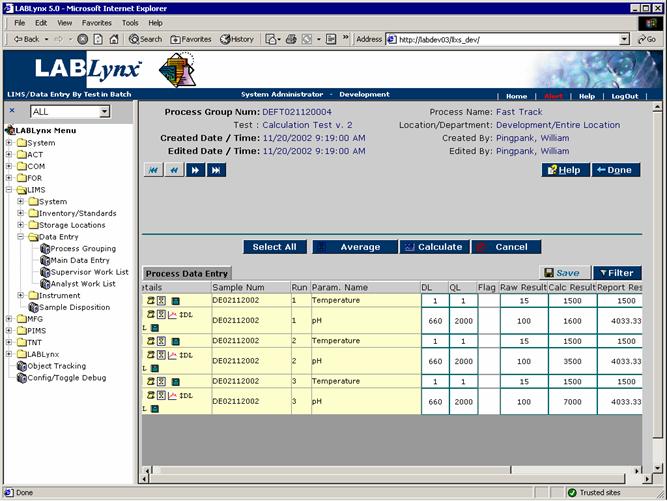
Another function available to the user is the ability to average results. Should multiple runs exist in this process batch, the user may select a series of results (by using the check box to the left of the row) and have the system generate an average result. The system will average all calculated results for the same sample/test/parameter combinations across the selected runs and update all of the respective report results with the average value, as well as placing an average icon in the details of each row of the selected runs:
