LabLynx KB:Sampling route management
|
|
This is an article specific to the Category:LabLynx knowledge base. Its context outside of LabLynx, Inc may not be apparent, thus why it appears inside the LabLynx KB namespace. |
Introduction
LabLynx enables you to add and edit sampling routes information, including schedule and container data.
System Administrators use LabLynx ELab to manage sampling route information, including:
- sampling route details
- assigned sample points
- sample point schedule information
- containers
Adding or editing sampling route information
The Sampling Routes List screen displays sampling route information currently defined in the system:
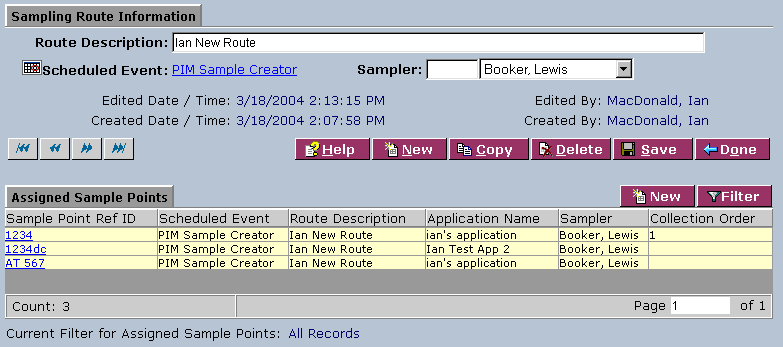
1. From the Sampling Routes List, select a route description or click New. The system displays the Sampling Route Information screen:
2. Complete the fields of the Sampling Route Information area. Fields in bold are required. The various fields are explained below:
| Field | Description |
|---|---|
| Route Description | Type a route description. |
| Scheduled Event | Click on the calendar icon to open the Add/Edit Copy Schedule with New Dates screen and select a date. Click Save. Click on the link to select a scheduled event from the Schedules List on the Schedules Lookup screen. |
| Sampler | Select the sampler from the drop-down list. Type the first letter(s) of the name in the field to the left for faster selection from the drop-down list. |
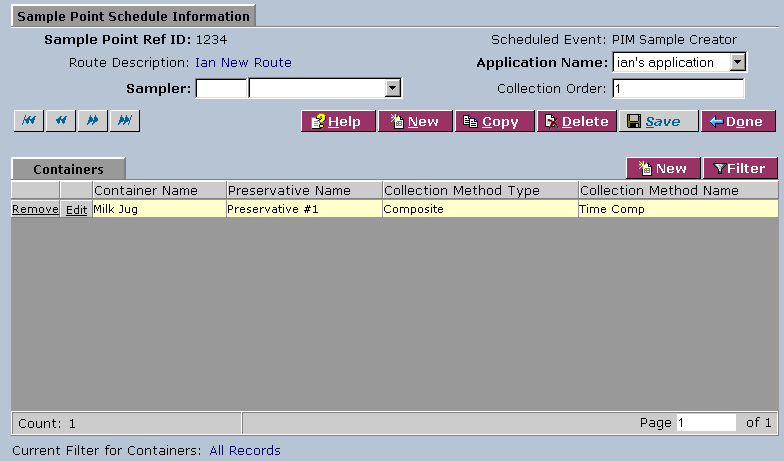
3. In the Assigned Sample Points area, click on a sample point reference ID to access the Sample Point Schedule Information area:
4. Complete the fields of the Sample Point Schedule Information area. Fields in bold are required. The various fields are explained below:
| Field | Description |
|---|---|
| Application Name | Select a name from the drop-down list. |
| Sampler | Select the sampler from the drop-down list. Type the first letter(s) of the name in the field to the left for faster selection from the drop-down list. |
| Collection Order | Type the collection order. |
5. For information on adding and editing data in the Containers area, refer to this article.
6. When you are finished, click Save and then Done.


